Chocolate Peanut Butter Dream BarsIngredients Recipe
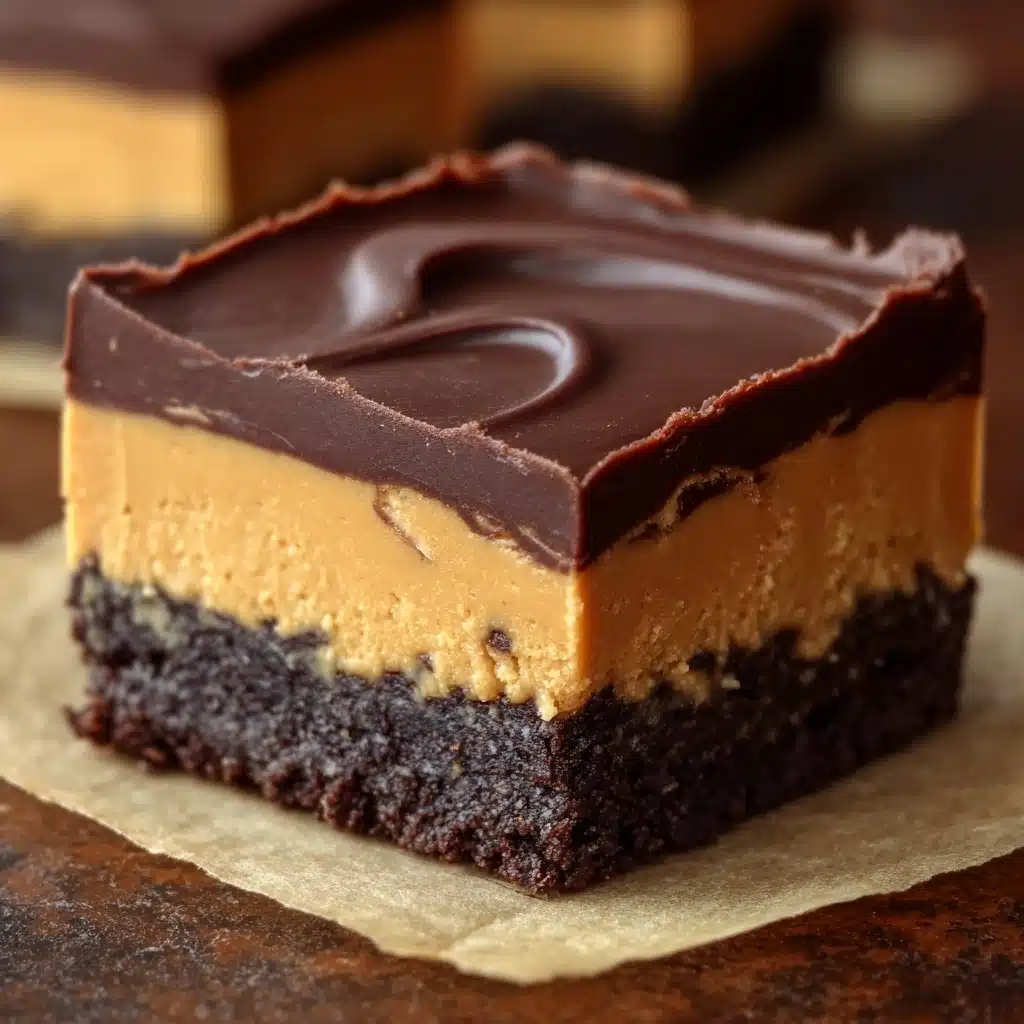
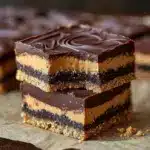
If you’re looking for a no-bake dessert that wows both peanut butter lovers and chocolate fanatics, these Chocolate Peanut Butter Dream BarsIngredients are about to become your new favorite treat. The magic happens in layers: a crisp, chocolatey crust, ultra-creamy peanut butter filling, silky chocolate pudding, and a topper of fluffy whipped cream. Every bite is the perfect blend of sweet and salty, creamy and crunchy. Whether it’s for a potluck, family night, or just because, bring these bars and expect zero leftovers!

Ingredients You’ll Need
This recipe is all about simple, dependable ingredients coming together to create pure dessert bliss. Each element plays a starring role in the taste, texture, and stunning layers of these Chocolate Peanut Butter Dream BarsIngredients.
- Chocolate sandwich cookies: Create the deep, fudgy foundation of the crust, providing a satisfying crunch and chocolatey flavor.
- Unsalted butter: Binds the cookie crumbs together and adds melt-in-your-mouth richness.
- Creamy peanut butter: Brings that irresistible, nutty smoothness to the second layer—make sure it’s creamy for the best texture.
- Cream cheese: Adds tang and body to the peanut butter layer, making it decadently smooth and sliceable.
- Powdered sugar: Sweetens and thickens the peanut butter mixture without any grittiness.
- Vanilla extract: Rounds out the flavors with a warm, bakery-style touch.
- Whipped topping: Makes the peanut butter layer luscious and light, and forms the dreamy finish on top.
- Instant chocolate pudding mix: Guarantees a layer of rich, glossy chocolate with no fuss.
- Cold milk: Activates the pudding mix for a set, satiny layer.
- Chopped peanuts: Optional, but they bring a little salty crunch to the final bite.
- Chocolate shavings or mini chips: The crowning jewel for extra chocolate drama and a pretty finish.
How to Make Chocolate Peanut Butter Dream BarsIngredients
Step 1: Make the Chocolate Cookie Crust
Start by finely crushing your chocolate sandwich cookies (a food processor makes this super quick). Mix them with melted butter until every crumb glistens, then press firmly into your lined 9×9-inch pan. This is the base that holds everything together and gives you that perfect snap in every bar. Pop it in the fridge or freezer for at least 15 minutes to set while you prepare the next layer.
Step 2: Whip Up the Creamy Peanut Butter Layer
In a mixing bowl, beat together creamy peanut butter, room-temperature cream cheese, powdered sugar, and a splash of vanilla extract. You’re aiming for a super smooth, thick mixture. Once it’s lump-free, gently fold in the whipped topping—this is what gives the layer its cloud-like, mousse-like finish. Spread this luscious mixture evenly over your chilled crust, making sure to go all the way to the edges.
Step 3: Prepare the Silky Chocolate Pudding
Grab your instant chocolate pudding mix and cold milk, and whisk them together for about two minutes until thick and glossy. This no-cook pudding is key to keeping things easy—and it sets up into the most craveable layer. Carefully spread it over the peanut butter layer, taking care not to mix the layers together.
Step 4: Add the Whipped Topping and Garnishes
Spoon the remaining whipped topping over the chocolate pudding and gently spread it into a thick, fluffy layer. This is where you get creative: sprinkle with chopped peanuts for crunch, and a generous flurry of chocolate shavings or mini chocolate chips for that final bit of wow factor. You can make these Chocolate Peanut Butter Dream BarsIngredients as fancy or as simple as you like!
Step 5: Chill to Set, Then Slice and Serve
Cover the pan loosely with plastic wrap and let your bars chill in the fridge for at least 4 hours (overnight is even better if you have the patience). This ensures all the layers set up for those glorious, clean squares. When ready to serve, lift the bars from the pan using the parchment, slice with a sharp knife, and marvel at those perfect layers of Chocolate Peanut Butter Dream BarsIngredients.
How to Serve Chocolate Peanut Butter Dream BarsIngredients
Garnishes
Once your bars are chilled and sliced, have some fun with the garnishes! Scatter more chopped peanuts for a salty crunch, dust with extra chocolate shavings for a bakery finish, or drizzle with a touch of warmed peanut butter for a show-stopping look. Every little touch adds a bit of flair and flavor to these dreamy bars.
Side Dishes
Since these bars pack a deliciously rich punch, pair them with something refreshing like fresh berries or a citrus fruit salad to brighten things up. If you’re serving them at a party, a big glass of cold milk or a mug of hot coffee balances the sweetness perfectly. These Chocolate Peanut Butter Dream BarsIngredients also go just right with a scoop of vanilla ice cream for the ultimate indulgent duo.
Creative Ways to Present
For special occasions, cut the bars into mini squares and arrange them on a beautiful platter—great for dessert buffets or potlucks. Want something a little more elegant? Serve each bar in a cupcake wrapper, or layer broken bars into parfait glasses with extra whipped cream and fruit for an inventive, trifle-style dessert featuring all the best of Chocolate Peanut Butter Dream BarsIngredients.
Make Ahead and Storage
Storing Leftovers
Place leftover bars in an airtight container and keep them chilled in the fridge. They’ll stay fresh and delicious for up to 5 days—the texture might even get more luscious as those layers meld together. Stack with parchment or wax paper between layers if you need to save space.
Freezing
Chocolate Peanut Butter Dream BarsIngredients freeze like a charm. Wrap each slice individually or store the whole pan (tightly wrapped) for up to 2 months. Just let them thaw overnight in the fridge before serving for that perfect, creamy consistency.
Reheating
These bars are meant to be served cold, so reheating isn’t needed. In fact, they’re best enjoyed straight from the fridge for ultimate creaminess and clean, beautiful layers. If they’ve been in the freezer, let them thaw in the refrigerator first.
FAQs
Can I use natural peanut butter for this recipe?
For the smoothest, most stable layer, stick to standard creamy peanut butter—not the natural type, which tends to separate and create a runny texture. The classics work best for Chocolate Peanut Butter Dream BarsIngredients.
What if I don’t have instant chocolate pudding?
If you’re in a pinch, you can substitute with a homemade chocolate ganache or any chocolate pudding that sets firmly. The goal is a chocolate layer that holds its shape when sliced.
Can I make this recipe gluten free?
Absolutely! Just substitute the chocolate sandwich cookies for a gluten-free version, making sure they crush to a similar texture. All other ingredients are naturally gluten free, so you’re set!
Do these bars travel well for potlucks?
Yes, they’re potluck superstars! Chill them thoroughly before travel, slice, and pack in a snug, flat container. Keep cold using an ice pack if the weather is warm to make sure your Chocolate Peanut Butter Dream BarsIngredients arrive in top form.
Can I use homemade whipped cream instead of whipped topping?
Definitely—just whip heavy cream with a touch of sugar until stiff peaks form. Use it in place of store-bought whipped topping in both the peanut butter layer and as the final topping for a fresher flavor and silky texture.
Final Thoughts
If you’re ready for love at first bite, don’t wait another minute to whip up a batch of Chocolate Peanut Butter Dream BarsIngredients. Their delightful layers are guaranteed to wow your taste buds and impress your friends—make them once and you’ll be hooked!
PrintChocolate Peanut Butter Dream BarsIngredients Recipe
Indulge in these decadent Chocolate Peanut Butter Dream Bars that feature layers of rich chocolate, creamy peanut butter, and a crunchy cookie crust. Perfect for satisfying your sweet tooth!
- Prep Time: 20 minutes
- Cook Time: 0 minutes
- Total Time: 4 hours 20 minutes
- Yield: 9 servings 1x
- Category: Dessert
- Method: Baking
- Cuisine: American
- Diet: Vegetarian
Ingredients
For the Crust:
- 24 chocolate sandwich cookies (like Oreos), finely crushed
- 5 tablespoons unsalted butter, melted
For the Peanut Butter Layer:
- 1 cup creamy peanut butter
- 8 oz cream cheese, softened
- 1/2 cup powdered sugar
- 1 teaspoon vanilla extract
- 1 cup whipped topping (like Cool Whip or homemade)
For the Chocolate Layer:
- 1 (3.9 oz) package instant chocolate pudding mix
- 1 1/2 cups cold milk
Topping:
- 1 1/2 cups whipped topping
- 1/4 cup chopped peanuts (optional)
- Chocolate shavings or mini chocolate chips (optional)
Instructions
- Make the crust: Combine crushed cookies and melted butter. Press into a 9×9-inch baking dish lined with parchment paper. Freeze or chill for 15 minutes.
- Peanut butter layer: Beat together peanut butter, cream cheese, powdered sugar, and vanilla until smooth. Fold in whipped topping. Spread evenly over the crust.
- Chocolate pudding layer: Whisk pudding mix and cold milk for 2 minutes until thick. Spread over peanut butter layer.
- Top it off: Spread remaining whipped topping on top. Sprinkle with chopped peanuts and chocolate chips or shavings, if desired.
- Chill: Refrigerate for at least 4 hours or until fully set.
- Slice and serve cold!
Nutrition
- Serving Size: 1 bar
- Calories: 380
- Sugar: 23g
- Sodium: 320mg
- Fat: 27g
- Saturated Fat: 12g
- Unsaturated Fat: 12g
- Trans Fat: 0g
- Carbohydrates: 30g
- Fiber: 2g
- Protein: 9g
- Cholesterol: 35mg
Keywords: Chocolate Peanut Butter Dream Bars, Dessert Recipe, Chocolate Peanut Butter Bars


