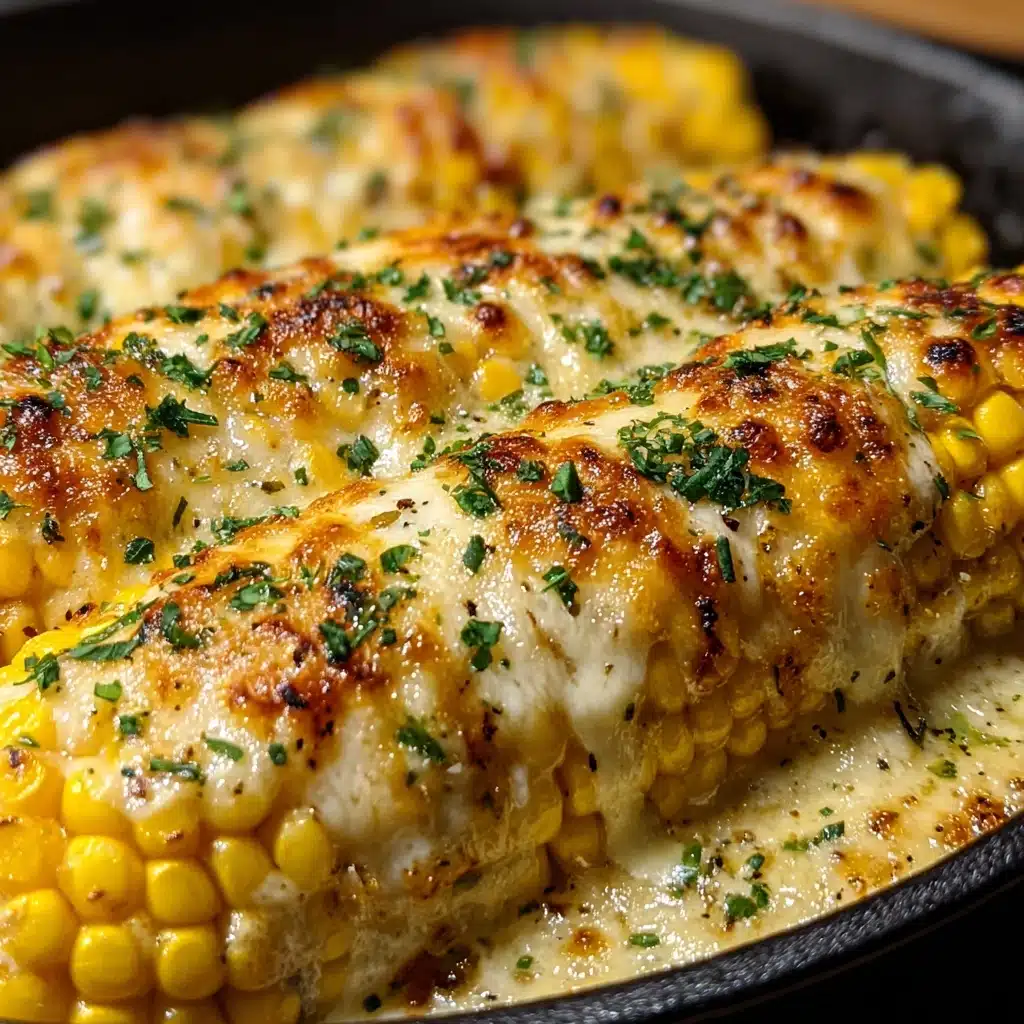
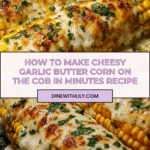
How to Make Cheesy Garlic Butter Corn on the Cob in Minutes Recipe
When you’re craving something absolutely irresistible but don’t have a lot of time, let me show you how to make cheesy garlic butter corn on the cob in minutes. This dish transforms basic fresh corn into a flavor-packed, crowd-pleasing treat, thanks to the perfect marriage of garlicky butter and Parmesan cheese that clings to each juicy kernel. Whether you’re elevating a weeknight meal, prepping for a picnic, or just wanting that cheeky summer street food fix, this corn is all about big, bold tastes with minimal effort. If you’re new to upgrading your corn-on-the-cob game, get ready for it to become your go-to side for every season!
Ingredients You’ll Need
The magic of this recipe is in its simplicity — each ingredient brings something essential, whether it’s creamy richness, aromatic warmth, or a pop of color. Don’t skip anything! Even the smallest additions help create that signature cheesy garlic butter flavor you’ll crave.
- Fresh Corn: Use four ears with the husks removed — nothing beats the natural sweetness and juiciness of fresh corn here!
- Light Butter (melted): Two tablespoons of light, melted butter give you luscious flavor without too much heaviness — perfect for brushing every kernel.
- Garlic (minced): Three finely minced cloves infuse each bite with true garlic depth (don’t be shy with it!).
- Reduced-Fat Parmesan Cheese (grated): A quarter cup gives you tangy, savory cheesiness that melts just enough to envelop the corn.
- Garlic Powder: One teaspoon boosts that garlicky flavor so nothing gets lost, especially if you love garlic.
- Smoked Paprika: A half teaspoon adds a gentle, smoky complexity and a nice touch of color.
- Fresh Parsley: One tablespoon chopped (or one teaspoon dried) adds fresh, grassy brightness to balance the buttery richness.
- Salt and Pepper: Add both to taste — these are musts for pulling all those big flavors together.
- Red Pepper Flakes or Chili Powder (optional): A pinch brings subtle heat, if you like a little spicy kick on your corn.
How to Make How to Make Cheesy Garlic Butter Corn on the Cob in Minutes
Step 1: Cook the Corn
Your first decision: boiling, grilling, or air-frying! For classic tenderness, drop the corn into boiling water for 8-10 minutes. Craving charred edges and a little smoky flair? Fire up the grill for 10-12 minutes, rotating every few minutes so the cobs cook evenly. Air-fryer enthusiasts will love the hands-off approach — just spritz the corn, pop it in at 400°F, and let it go for 10-15 minutes. Any of these methods get your corn perfectly plump and ready for all the cheesy garlic butter goodness!
Step 2: Make the Garlic Butter Sauce
This step is the flavor bomb! In a small bowl, stir together your melted light butter, minced garlic, garlic powder, smoked paprika, salt, and pepper. You’ll notice the aroma is already heavenly — that’s how you know you’re on the right track! This quick sauce is what makes how to make cheesy garlic butter corn on the cob in minutes a total game-changer compared to plain corn.
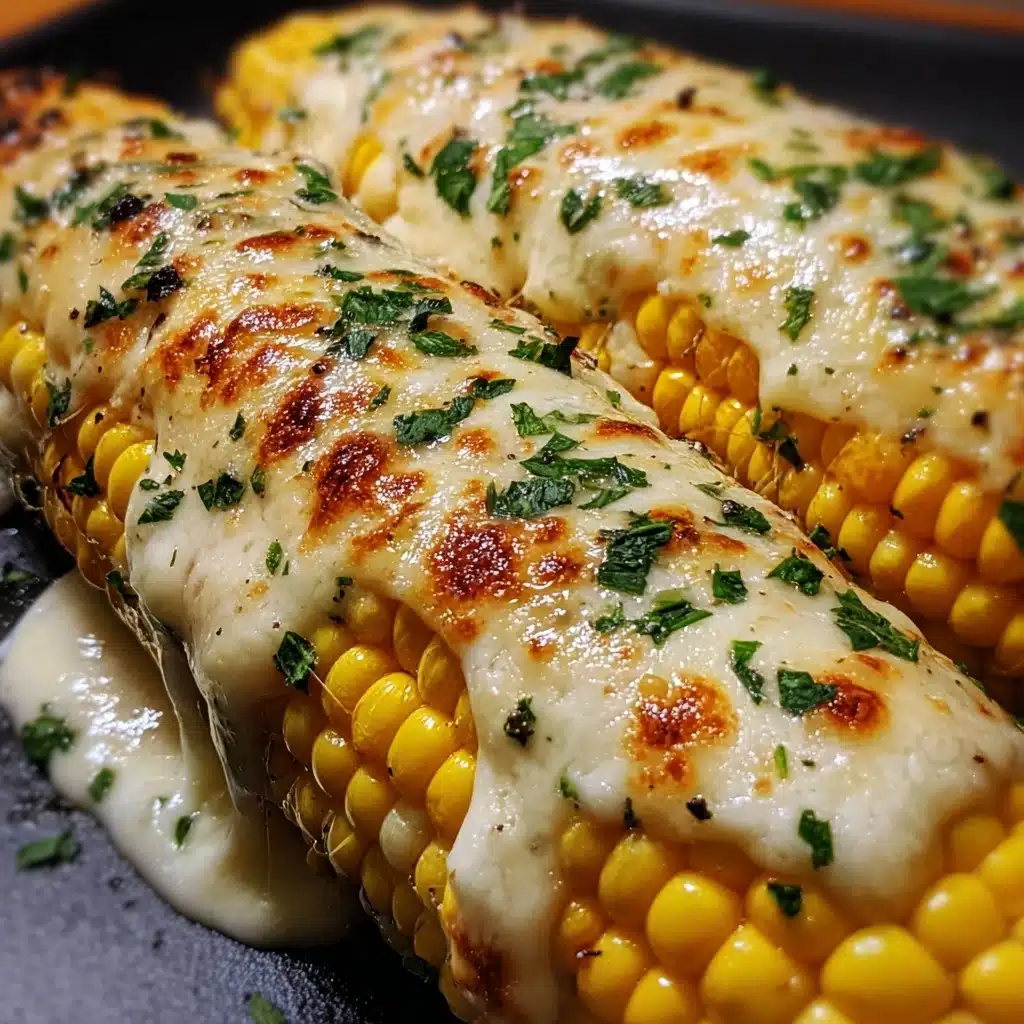
Step 3: Coat & Cheese It Up
Brush each steaming hot ear of corn with a generous layer of your garlic butter mixture. The warmer the corn, the better, as it soaks up every drop of that butter. As soon as you’ve brushed them, shower them with the grated Parmesan. The cheese will cling to the hot, buttery surface and soften just enough — this step is where the magic happens!
Step 4: Garnish & Serve
Don’t forget to finish with a flourish! Sprinkle chopped parsley over all the cobs for fresh color and flavor. If you’re feeling bold, hit it with a pinch of red pepper flakes or chili powder for that pop of heat. Serve immediately, while everything is warm and melty — and watch how fast these disappear!
How to Serve How to Make Cheesy Garlic Butter Corn on the Cob in Minutes
Garnishes
Fresh parsley is wonderful for a splash of color and herbal brightness, but you can also try a scatter of chives, extra Parmesan, or even thin slices of green onion for an extra kick. Crush a little flaky sea salt over the top right before serving for a perfect finish!
Side Dishes
This corn pairs beautifully with almost everything — think grilled chicken, burgers, barbecue ribs, or a bright summer salad. For vegetarians, serve alongside a zesty bean salad or marinated tofu steaks. Want it as a snack? Pair it with a cool, tangy yogurt dipping sauce or a simple green salad to offset the richness.
Creative Ways to Present
If you want to impress, cut each ear into thirds and stand them upright as little “corn towers” on a platter, dusted with plenty of cheese and parsley. For parties, thread the corn onto skewers for easy, mess-free eating. Tiny flags or fun corn holders can make each piece feel like its own treat, perfect for picnics or backyard gatherings.
Make Ahead and Storage
Storing Leftovers
If you somehow manage to have leftovers, store the finished corn (coated in cheesy garlic butter) in an airtight container in the fridge for up to 3 days. The flavors deepen overnight, making for an excellent quick lunch or snack the next day.
Freezing
You can freeze cooked and buttered corn for up to two months. Let the corn cool completely, then tightly wrap each ear in foil or plastic wrap before sealing in a freezer bag. To enjoy later, just thaw overnight in the fridge before reheating.
Reheating
To revive that fresh-off-the-grill magic, reheat the corn in the oven at 350°F, wrapped in foil for about 10 minutes, or pop it in the microwave for quick convenience. A quick extra sprinkle of Parmesan after heating brings back all those cheesy, melty vibes!
FAQs
Can I use frozen corn on the cob instead of fresh?
Absolutely! Frozen corn works almost as well. Thaw it completely first, then cook using your preferred method. The flavor will be just as delicious, though fresh corn will have that unbeatable summer sweetness.
Is there a vegan version of this recipe?
You bet! Swap out the light butter for a vegan buttery spread, and use nutritional yeast or your favorite dairy-free Parmesan alternative. The rest of the process stays exactly the same, so everyone can dig in.
Can I prepare the garlic butter ahead of time?
Yes, the garlic butter can be mixed up to 24 hours in advance. Keep it covered in the fridge. Just give it a good stir before using and, if needed, melt again in the microwave for a few seconds so it’s easy to brush on your corn.
What’s the best way to keep the cheese from falling off?
Brush the corn while it’s still piping hot — this ensures the Parmesan cheese melts slightly and clings to the buttery surface. If needed, gently press the cheese onto the corn with the back of a spoon to help it stick before serving.
Is it possible to make this recipe without paprika?
Definitely! Smoked paprika brings a smoky nuance, but you can skip it if you don’t have any on hand. Try substituting with a pinch of ground cumin or even sweet paprika for a different twist.
Final Thoughts
I hope you’re as excited as I am to try how to make cheesy garlic butter corn on the cob in minutes — this isn’t just a recipe, it’s an invitation to bring more flavor, fun, and color to your table. You’ll love how quickly it comes together and how big a splash it makes at any meal. Go give it a try — and don’t be surprised if it becomes your most requested side dish all year long!
PrintHow to Make Cheesy Garlic Butter Corn on the Cob in Minutes Recipe

Learn how to make a delicious and flavorful Cheesy Garlic Butter Corn on the Cob in just minutes. This recipe combines the sweetness of fresh corn with a savory garlic butter sauce and a sprinkle of Parmesan cheese for a mouthwatering side dish.
- Prep Time: 10 minutes
- Cook Time: 10-15 minutes
- Total Time: 20-25 minutes
- Yield: 4 servings 1x
- Category: Side Dish
- Method: Boil, Grill, Air-Fry
- Cuisine: American
- Diet: Vegetarian
Ingredients
Corn on the Cob:
- 4 ears fresh corn (husks removed)
Garlic Butter Sauce:
- 2 tbsp light butter (melted, e.g., Land O’Lakes Light)
- 3 cloves garlic (minced)
- 1 tsp garlic powder
- 1/2 tsp smoked paprika
- Salt and pepper to taste
- Optional: Pinch of red pepper flakes or chili powder
Cheese Topping:
- 1/4 cup grated reduced-fat Parmesan cheese
- 1 tbsp fresh parsley (chopped, or 1 tsp dried)
Instructions
- Cook the Corn
Boil: Bring a large pot of water to a boil. Add corn and cook for 8-10 minutes.
OR Grill: Preheat grill to medium-high. Brush corn with a light spray of oil and grill for 10-12 minutes, turning occasionally.
OR Air-Fry: Spritz corn with cooking spray and air-fry at 400°F for 10-15 minutes. - Make the Garlic Butter Sauce
In a small bowl, mix melted light butter, minced garlic, garlic powder, smoked paprika, salt, and pepper.
- Coat & Cheese It Up
Brush each cooked corn ear generously with the garlic butter mixture.
Sprinkle grated Parmesan cheese over the corn while it’s still warm (the heat will help the cheese stick). - Garnish & Serve
Top with fresh parsley and a pinch of red pepper flakes (if using). Serve immediately!
Notes
- For extra heat, add more red pepper flakes or chili powder.
- Feel free to adjust the seasonings to suit your taste preferences.
- This dish pairs well with grilled meats or as a standalone snack.
Nutrition
- Serving Size: 1 ear of corn
- Calories: 180
- Sugar: 6g
- Sodium: 310mg
- Fat: 6g
- Saturated Fat: 3g
- Unsaturated Fat: 2g
- Trans Fat: 0g
- Carbohydrates: 30g
- Fiber: 3g
- Protein: 5g
- Cholesterol: 10mg
Keywords: Cheesy, Garlic, Butter, Corn on the Cob, Side Dish, Easy Recipe