Cherry Filled Crescent Rolls Recipe
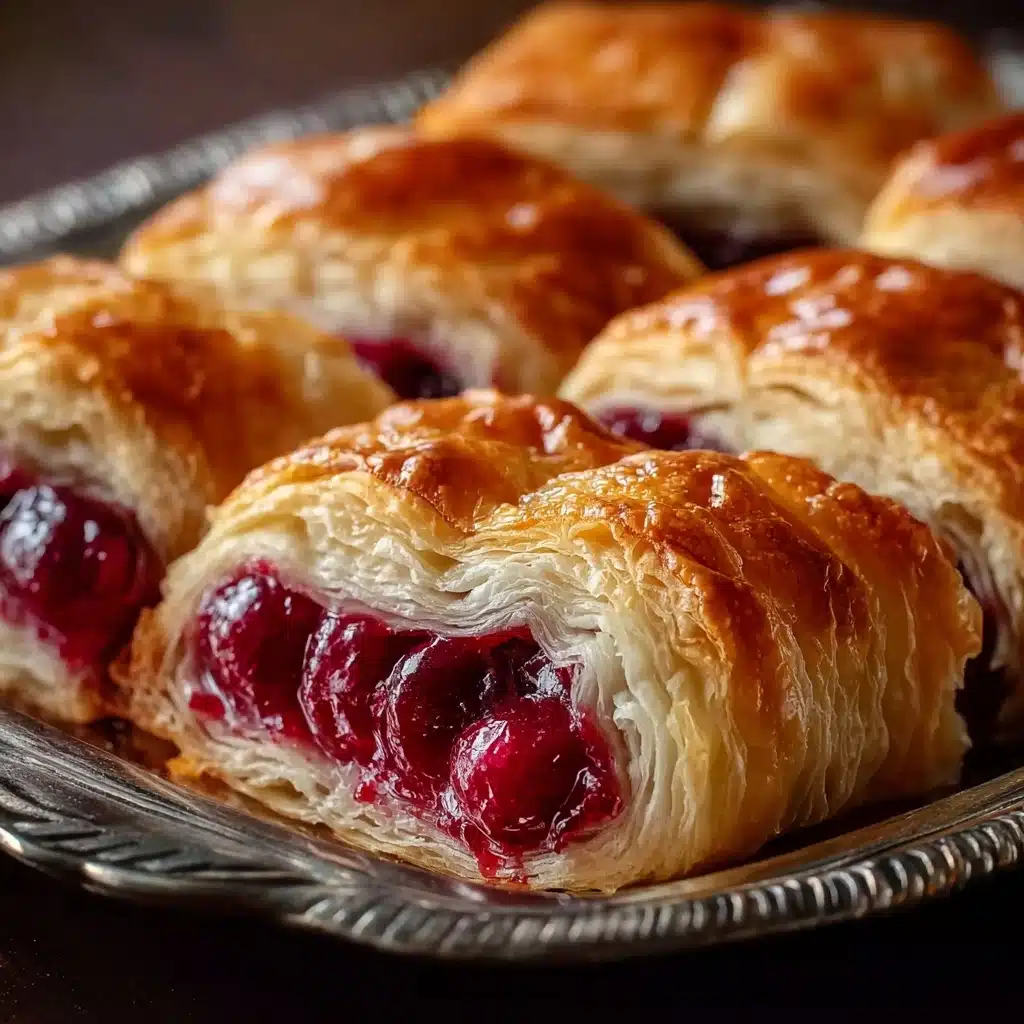
There’s a certain magic in that first bite of Cherry Filled Crescent Rolls—flaky, golden pastry wrapped delicately around sweet-tart cherries, finished with a glossy sugar glaze. This is the kind of easy, crowd-pleasing treat you make once and immediately add to your permanent recipe rotation! Whether you’re pulling them hot from the oven for a weekend brunch or sharing them around a cozy coffee table, Cherry Filled Crescent Rolls bring a joyful pop of color and flavor to the occasion with minimum effort and maximum reward.
Ingredients You’ll Need
The beauty of Cherry Filled Crescent Rolls is in the simplicity of its ingredients—each one working together for irresistible results. These pantry staples come together to create layers of flavor, from the buttery dough to the ruby red cherry filling and sweet, creamy glaze.
- Crescent roll dough: Using refrigerated crescent rolls makes this recipe quick and easy, and gives the perfect flaky, buttery texture.
- Cherry pie filling: Sweet, jammy cherries bring vibrant color and a burst of flavor—plus, you only need a spoonful per roll for a satisfying center.
- Powdered sugar: Essential for the glaze, powdered sugar dissolves smoothly to deliver a lovely sweetness with no grit.
- Milk: Just a splash helps thin the glaze so it glides over the warm rolls, adding a dreamy finish.
How to Make Cherry Filled Crescent Rolls
Step 1: Preheat Your Oven
Before you do anything, set your oven to 375°F (190°C) so it’s at the perfect temperature by the time your Cherry Filled Crescent Rolls are shaped and ready to bake. A properly heated oven is key for getting that signature golden crust.
Step 2: Prepare the Crescent Rolls
Unroll your crescent roll dough and gently separate it into 8 triangles. This step is a breeze—just take your time so the dough doesn’t tear. These triangles form the perfect base for holding the luscious cherry filling inside.
Step 3: Add the Cherry Filling
Spoon a generous tablespoon of cherry pie filling onto the wide end of each triangle. Try to keep the filling centered—if it’s too close to the edges, it might bubble out in the oven (which honestly just adds to their homemade charm, but a tidy roll is pretty too!).
Step 4: Roll Up the Crescents
Starting from the wide edge, gently roll each triangle toward the tip. Take care as you roll so the cherry filling stays snug inside. Place your rolls seam-side down on a parchment-lined baking sheet for easy removal and cleanup.
Step 5: Bake to Perfection
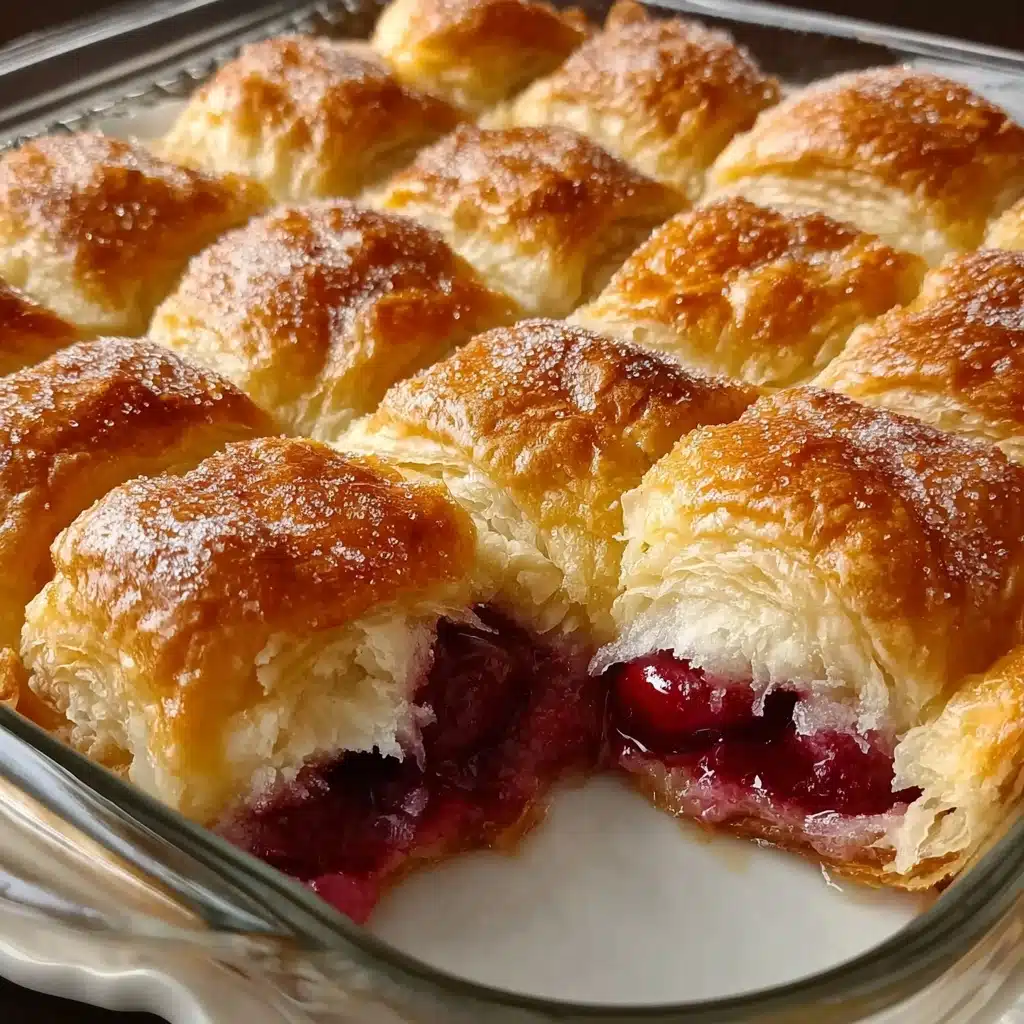
Slide your tray into the oven and bake for 12 to 15 minutes, or until the crescent rolls are pillowy and golden brown. The transformation is worth watching—these Cherry Filled Crescent Rolls will puff up and lightly brown, and the kitchen will fill with the most welcoming aroma.
Step 6: Make the Sweet Glaze
While the rolls are baking, whisk together the powdered sugar and milk in a small bowl until you have a silky-smooth glaze. The consistency should be thick enough to cling, but pourable enough to drizzle in elegant ribbons across your rolls.
Step 7: Glaze the Warm Rolls
Once your Cherry Filled Crescent Rolls have cooled for a few minutes, drizzle the glaze over the top of each one. The residual warmth lets the glaze slightly melt into the pastry, setting up beautifully for that picture-perfect finish.
Step 8: Serve and Savor
Now comes the best part—serving! Cherry Filled Crescent Rolls are at their most irresistible when warm, so try to time them for your guests (or your own cravings). Each bite is flaky, sweet, and full of juicy cherry goodness.
How to Serve Cherry Filled Crescent Rolls
Garnishes
Dress up your Cherry Filled Crescent Rolls with a dusting of extra powdered sugar, a few fresh cherries or berries on the plate, or a twist of lemon zest for a bright touch. Even a sprig of mint makes them pop—don’t be afraid to make it special!
Side Dishes
Pair these rolls with creamy vanilla ice cream, a dollop of whipped cream, or a spoonful of tangy Greek yogurt. For brunch, they’re fantastic alongside fresh fruit or a frothy cappuccino for that true bakery-style experience.
Creative Ways to Present
Try stacking Cherry Filled Crescent Rolls on a tiered cake stand, or serve them in decorative muffin wrappers for a grab-and-go treat at parties. They also look gorgeous arranged on a rustic wooden board for a sweet, casual vibe at family gatherings.
Make Ahead and Storage
Storing Leftovers
If you have any rolls left over (unlikely!), let them cool completely before transferring to an airtight container. Cherry Filled Crescent Rolls will stay fresh at room temperature for up to two days, or refrigerate for up to four days for best texture.
Freezing
Yes, these rolls are freezer-friendly! Wrap each completely cooled crescent roll in plastic wrap, then place in a zip-top bag. Store in the freezer for up to one month—just remember to add the glaze after thawing for best results.
Reheating
Reheat Cherry Filled Crescent Rolls in a 325°F (165°C) oven for 5–8 minutes, or until warmed through and flaky again. If microwaving, use short bursts so they don’t turn soggy. Add a fresh drizzle of glaze before serving for that just-baked flavor.
FAQs
Can I use homemade cherry filling instead of canned?
Absolutely! If you prefer, make your own cherry compote or pie filling—just let it cool before spooning onto the dough. Homemade filling adds a personal twist and lets you control the sweetness.
What if my crescent rolls unroll or leak filling in the oven?
This happens sometimes and is part of their rustic charm. To minimize leaks, be sure not to overfill, and pinch the edges securely before baking. Even the messy ones taste delicious!
Can I make these with different fillings?
Yes, these are wonderfully adaptable. Try apple, blueberry, or even chocolate-hazelnut spread in place of cherry pie filling for a fun variation on classic Cherry Filled Crescent Rolls.
Is it possible to double the recipe?
No problem! Use multiple cans of crescent rolls and cherry filling, and bake in batches. It’s perfect for holiday brunches or serving a crowd—just keep the same baking temperature and check for doneness.
Do Cherry Filled Crescent Rolls need to be refrigerated?
If you plan to eat them within a day or two, they’re fine at room temperature. For longer storage, pop them in the fridge to keep the fruit fresh and the dough soft.
Final Thoughts
If you’re in the mood for an effortless dessert or a special morning treat, Cherry Filled Crescent Rolls are pure joy. They’re impressive enough for guests but easy enough for a lazy weekend. Don’t hesitate—gather your ingredients and treat yourself to this sweet, simple pleasure!
PrintCherry Filled Crescent Rolls Recipe

Indulge in these delightful Cherry Filled Crescent Rolls that are easy to make and perfect for a sweet treat. The combination of flaky crescent rolls and luscious cherry pie filling makes for a delicious dessert or snack.
- Prep Time: 15 minutes
- Cook Time: 15 minutes
- Total Time: 30 minutes
- Yield: 8 rolls 1x
- Category: Dessert
- Method: Baking
- Cuisine: American
- Diet: Vegetarian
Ingredients
Crescent Rolls:
- 1 can of refrigerated crescent rolls (8 count)
Cherry Filling:
- 1 can of cherry pie filling
Glaze:
- ¼ cup of powdered sugar
- 1 tablespoon of milk
Instructions
- Preheat the Oven: Preheat your oven to 375°F (190°C) to ensure it’s ready for baking once you’ve prepared the rolls.
- Prepare the Crescent Rolls: Unroll the crescent rolls and separate them into 8 individual triangles. This will be the base for your cherry-filled treats.
- Add the Cherry Filling: Spoon a heaping tablespoon of cherry pie filling onto the wide end of each triangle. Make sure the filling is centered to prevent it from spilling out during baking.
- Roll the Crescents: Starting from the wide end, gently roll each triangle towards the pointed tip, enclosing the cherry filling inside. Place the rolled crescents on a baking sheet lined with parchment paper for easy cleanup.
- Bake: Place the baking sheet in the preheated oven and bake for 12-15 minutes, or until the crescent rolls are golden brown and flaky.
- Make the Glaze: While the crescent rolls are baking, prepare the glaze by whisking together the powdered sugar and milk in a small bowl until smooth.
- Glaze the Rolls: Once the crescent rolls are done baking, remove them from the oven and let them cool slightly. Drizzle the prepared glaze over the warm rolls for an extra touch of sweetness.
- Serve and Enjoy: Serve these Cherry Filled Crescent Rolls warm for the best taste. They’re perfect on their own or with a scoop of vanilla ice cream on the side.
Nutrition
- Serving Size: 1 roll
- Calories: 180
- Sugar: 12g
- Sodium: 210mg
- Fat: 7g
- Saturated Fat: 3g
- Unsaturated Fat: 3g
- Trans Fat: 0g
- Carbohydrates: 28g
- Fiber: 1g
- Protein: 2g
- Cholesterol: 0mg
Keywords: Cherry Filled Crescent Rolls, Dessert, Cherry Pie Filling, Easy Recipe

