Homemade Chocolate Buttons Recipe
Introduction
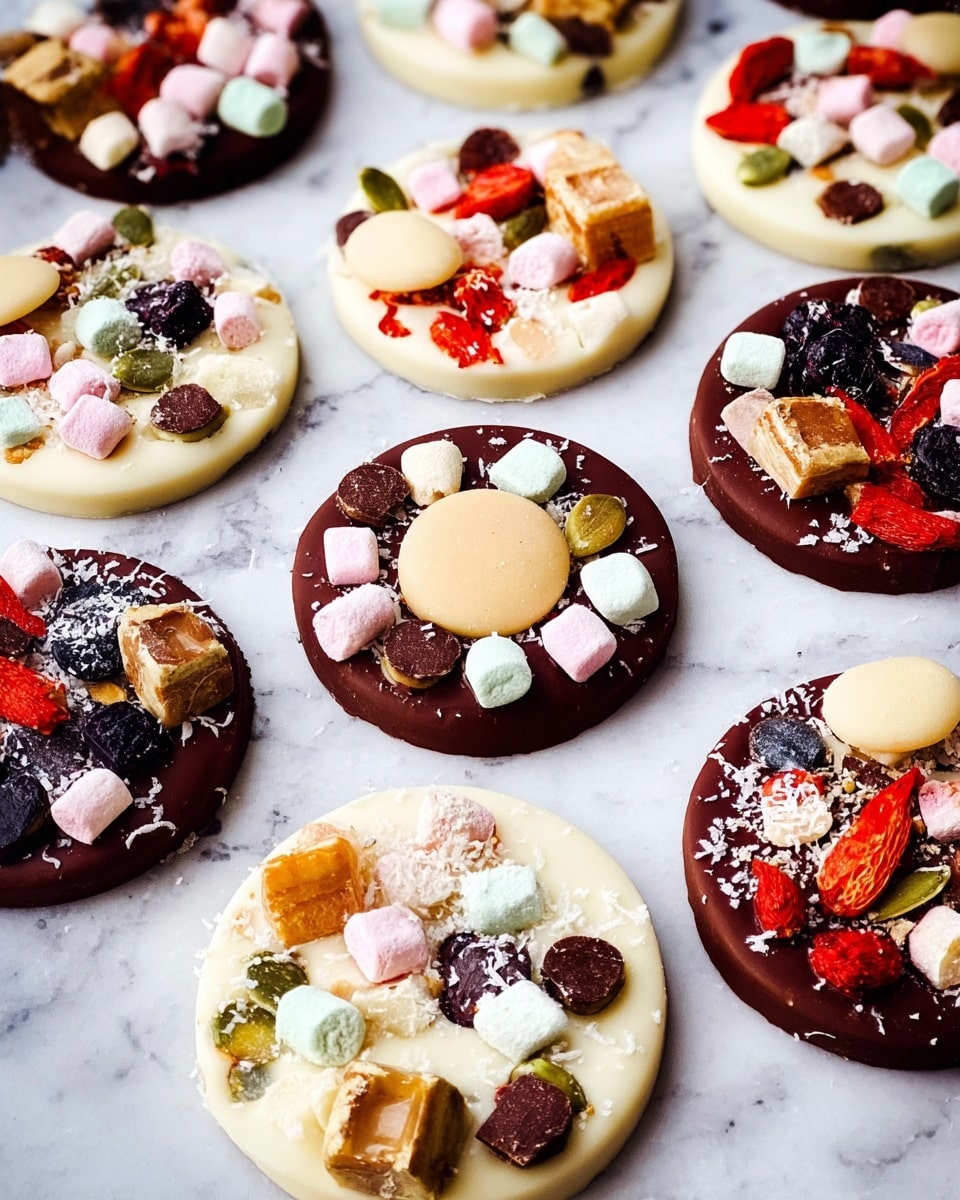
Making homemade chocolate buttons is a fun and rewarding way to enjoy sweet treats crafted in your own kitchen. With just a few simple steps, you can create glossy, perfectly tempered chocolate buttons that melt smoothly and look professional.
Ingredients
- 200g high-quality chocolate (dark, milk, or white)
Instructions
- Step 1: Break half of the chocolate into small pieces and place them in a heatproof bowl.
- Step 2: Set up a double boiler by filling a saucepan with a couple of inches of water and bringing it to a gentle simmer. Place the bowl over the saucepan without letting it touch the water.
- Step 3: Stir the chocolate occasionally as it melts until it reaches 40-54°C (104-129.2°F) depending on the type of chocolate.
- Step 4: Remove the bowl from the heat and stir in the remaining chocolate pieces, allowing the temperature to cool down to 25-28°C (77-82.4°F).
- Step 5: Return the bowl to the simmering water briefly to raise the chocolate temperature to 28-32°C (82.4-89.6°F), ensuring it is at the perfect working temperature.
- Step 6: Spoon small dollops of tempered chocolate onto a parchment-lined tray to form buttons.
- Step 7: Let the buttons set at room temperature until firm and glossy before removing them from the tray.
Tips & Variations
- Use a candy or digital thermometer for precise temperature control during tempering for best results.
- Add a pinch of sea salt or chopped nuts on top of the buttons before they set to add texture and flavor.
- Experiment with different types of chocolate or combine dark and milk chocolate for unique tastes.
Storage
Store the chocolate buttons in an airtight container at room temperature away from heat and sunlight. They will keep well for up to two weeks. Avoid refrigerating as this can cause condensation and affect the texture. If they soften, simply let them return to room temperature before enjoying.
How to Serve

Serve this delicious recipe with your favorite sides.
FAQs
Why is tempering chocolate important?
Tempering stabilizes the chocolate’s cocoa butter crystals, resulting in a shiny finish and a crisp snap. It also prevents the chocolate from melting too easily on your hands.
Can I use a microwave instead of a double boiler?
Yes, you can melt chocolate carefully in short bursts in the microwave, stirring frequently. Tempering steps should still be followed for the best finish.
PrintHomemade Chocolate Buttons Recipe

This Homemade Chocolate Buttons recipe guides you through melting and tempering chocolate using a double boiler method, resulting in glossy, professional-quality chocolate buttons that won’t melt in your hands. Ideal for confectionery, baking decoration, or snacking.
- Prep Time: 5 minutes
- Cook Time: 15 minutes
- Total Time: 20 minutes
- Yield: Approximately 40–50 chocolate buttons depending on size 1x
- Category: Confectionery
- Method: Melting using Double Boiler and Tempering on Stovetop
- Cuisine: International
Ingredients
Ingredients
- 200g high-quality chocolate (dark, milk, or white as preferred)
Instructions
- Set up the double boiler: Fill a saucepan with a couple of inches of water and bring it to a gentle simmer. Place a heatproof bowl on top, ensuring the bowl does not touch the water.
- Melt the initial chocolate: Break half of the chocolate into smaller pieces and add to the bowl. Stir occasionally as it melts to ensure a smooth, even consistency. Heat until the chocolate reaches 40-54°C (104-129.2°F), depending on chocolate type.
- Cool the chocolate: Remove the bowl from heat and add the remaining half of the chocolate. Stir continuously until this chocolate melts and the temperature cools to 25-28°C (77-82.4°F).
- Reheat to working temperature: Gently heat the chocolate again to 28-32°C (82.4-89.6°F) to bring it to its optimal working temperature for tempering.
- Form chocolate buttons: Once tempered, pour the chocolate onto a parchment-lined surface or into button molds. Spread evenly or allow to settle, then let it cool and set at room temperature.
- Store and use: Once fully set, carefully remove the chocolate buttons. Store them in a cool, dry place away from direct sunlight until ready to use.
Notes
- Use high-quality chocolate for best results.
- Tempering chocolate properly prevents it from melting easily and ensures a smooth, glossy finish.
- Use a thermometer to monitor chocolate temperatures accurately during the tempering process.
- Be careful not to let any water come into contact with the chocolate, or it may seize.
- The double boiler setup ensures gentle, controlled heating to avoid burning the chocolate.
- Cooling times may vary depending on room temperature.
Keywords: Chocolate buttons, tempered chocolate, homemade chocolate, confectionery, chocolate recipe, chocolate melting, chocolate tempering

