No Bake Oreo Pie Recipe
Introduction
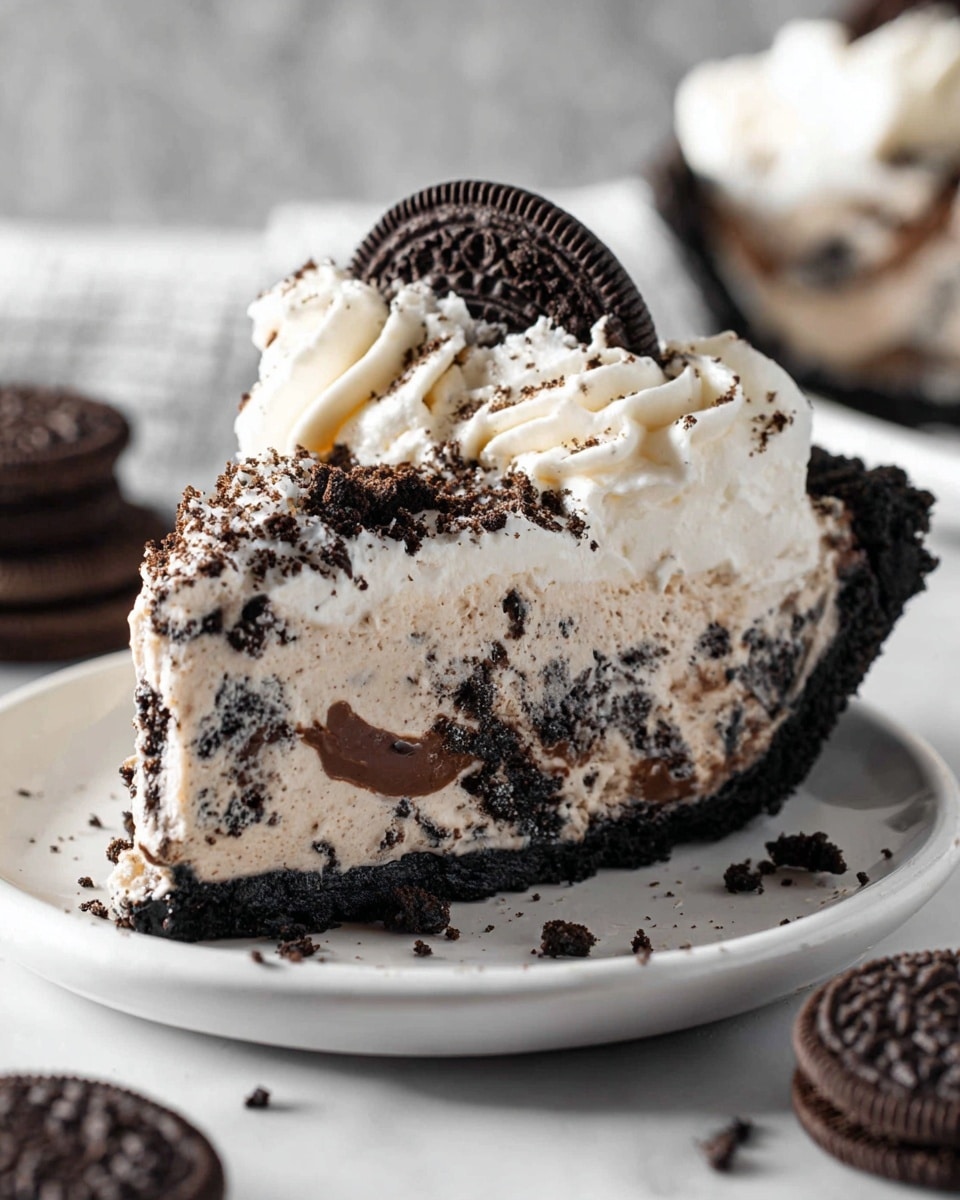
No Bake Oreo Pie is a rich, creamy dessert that comes together quickly without turning on your oven. With layers of chocolate fudge, cream cheese filling, and crunchy Oreos, it’s a crowd-pleaser that’s perfect for any occasion.
Ingredients
- 1 pre-made or homemade chocolate cookie pie crust
- 1 cup hot fudge (homemade or jarred)
- 8 oz cream cheese, softened (full fat or reduced fat)
- 1 cup powdered sugar
- 1 1/2 cups whipped topping (Cool Whip, original or preferred version)
- 15-20 Oreo cookies, crushed or chopped
Instructions
- Step 1: Warm the hot fudge slightly so it spreads easily, then spread an even layer on the bottom of the chocolate cookie crust. Set aside.
- Step 2: In a mixing bowl, beat the softened cream cheese with powdered sugar until completely smooth and creamy, using a stand or electric mixer for best results.
- Step 3: Gently fold in the whipped topping and crushed Oreos until well combined.
- Step 4: Spoon the filling into the prepared crust and smooth the top with a spatula.
- Step 5: Cover the pie with plastic wrap or the pie crust lid and refrigerate for at least 4 hours to let the flavors meld and the filling set.
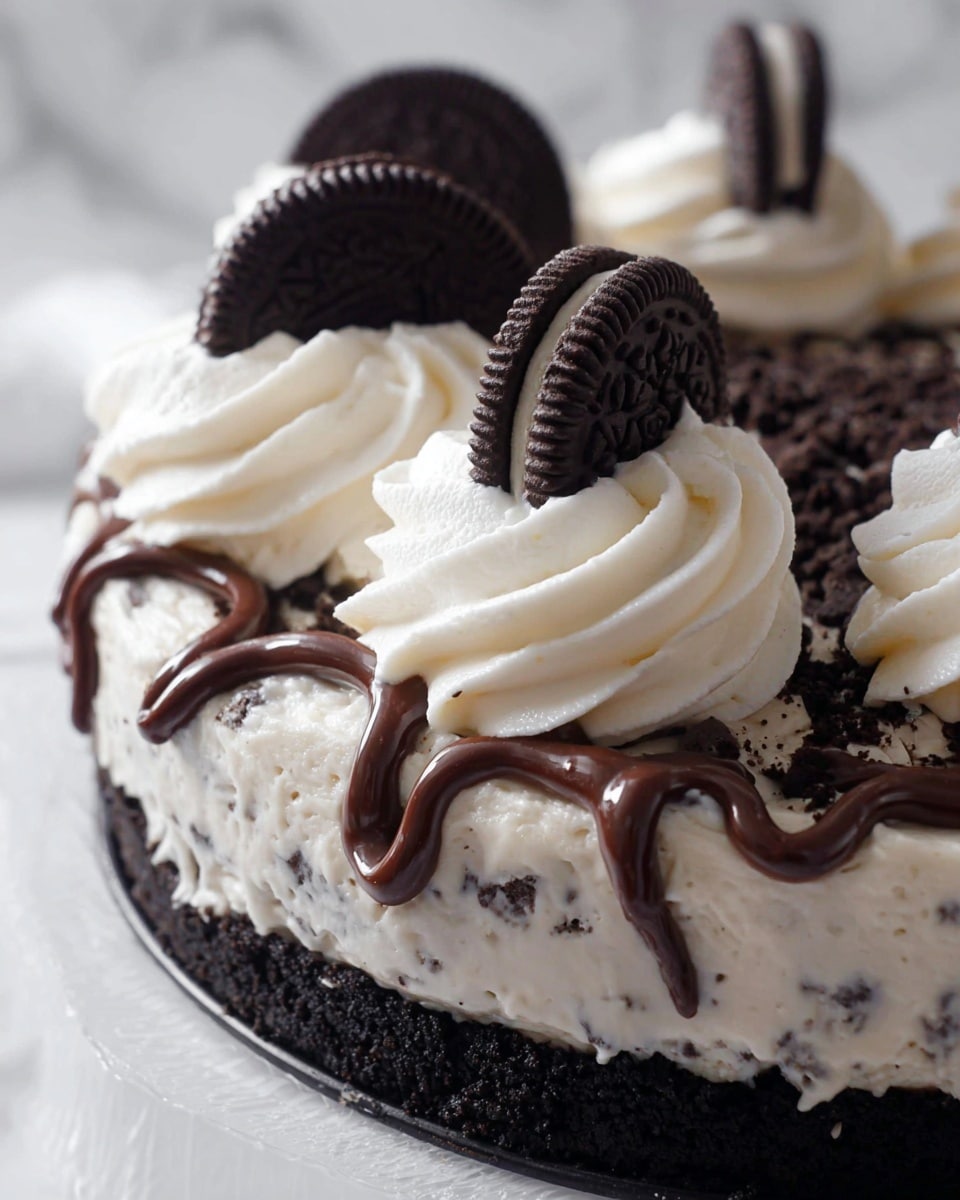
- Step 6: Before serving, optionally garnish with extra whipped topping, Oreo pieces, and a drizzle of fudge or chocolate syrup.
Tips & Variations
- For a gluten-free version, use gluten-free Oreos and make a homemade Oreo crust with gluten-free cookies and melted butter.
- Make your own Oreo crust by crushing cookies finely, mixing with melted butter, and pressing into a pie pan.
- Use reduced-fat cream cheese and light whipped topping for a lighter dessert.
- Try adding a splash of vanilla extract to the cream cheese mixture for extra flavor.
Storage
Store the pie covered in the refrigerator for up to 3 days. This keeps the filling firm and the crust crisp. To serve, slice with a warm knife for clean pieces. The pie can be frozen for up to 1 month; thaw overnight in the fridge before serving.
How to Serve
Serve this delicious recipe with your favorite sides.
FAQs
Can I make this pie ahead of time?
Yes, this no-bake pie actually benefits from resting in the fridge for at least 4 hours or overnight, which lets the flavors combine and the filling set perfectly.
Can I use a different cookie for the crust?
Absolutely! While Oreos give a classic taste, you can substitute with other chocolate sandwich cookies or even crushed chocolate graham crackers for a different flavor and texture.
PrintNo Bake Oreo Pie Recipe

No Bake Oreo Pie is a simple and delicious dessert featuring a chocolate cookie crust layered with rich hot fudge and a creamy filling made from cream cheese, powdered sugar, whipped topping, and crushed Oreos. This easy-to-make pie chills in the refrigerator, allowing the flavors to meld for a decadent treat perfect for any occasion.
- Prep Time: 15 minutes
- Cook Time: 0 minutes
- Total Time: 4 hours 15 minutes (includes chilling time)
- Yield: 8 servings 1x
- Category: Dessert
- Method: No-Cook
- Cuisine: American
- Diet: Vegetarian
Ingredients
Pie Crust
- Pre-made or homemade chocolate cookie pie crust (e.g., Oreo crust)
Filling
- 1 cup hot fudge (homemade or jarred hot fudge ice cream topping)
- 8 oz cream cheese, room temperature (full fat or 1/3 less fat)
- 1 cup powdered sugar
- 1 1/2 cups whipped topping (Cool Whip, original, extra creamy, low-fat, or sugar-free)
- 15–20 Oreo cookies, crushed or chopped
Optional Garnishes
- Additional whipped topping
- Extra Oreo cookies
- Drizzle of fudge topping or chocolate syrup
Instructions
- Prepare the crust and fudge layer: Warm the hot fudge slightly to make it easier to spread. Spread an even layer of warm hot fudge over the bottom of your pre-made or homemade chocolate cookie pie crust. Set aside.
- Make the filling: In a mixing bowl, beat the room temperature cream cheese and powdered sugar together with a stand mixer or electric mixer until the mixture is completely smooth and free of lumps.
- Add whipped topping and Oreos: Gently fold in the whipped topping and the crushed Oreo cookies until the filling is well combined.
- Fill the crust: Spoon the thick filling into the chocolate fudge-lined pie crust, smoothing the top with a spatula for an even layer.
- Chill the pie: Cover the pie with plastic wrap or the pie crust lid and refrigerate for at least 4 hours to allow the filling to firm up and the flavors to meld together, softening the cookie pieces.
- Garnish and serve: Before serving, optionally top the pie with additional whipped topping, extra Oreos, and a drizzle of fudge or chocolate syrup for extra decadence. Slice and enjoy!
Notes
- To make the pie gluten-free, use Gluten Free Oreos and make a homemade gluten-free Oreo crust using gluten-free Oreos and melted butter.
- For a homemade Oreo crust, crush Oreo cookies finely and combine with melted butter, then press into the pie plate.
- You can adjust the sweetness by varying the amount of powdered sugar in the filling.
- Use cream cheese at room temperature to ensure a smooth filling without lumps.
- Keep the pie refrigerated; it is best served chilled and eaten within 3-4 days.
Keywords: Oreo pie, no bake pie, no bake Oreo pie, Oreo dessert, chocolate cookie crust, easy dessert, no bake dessert


