Nourishing Chicken Congee Recipe
Introduction
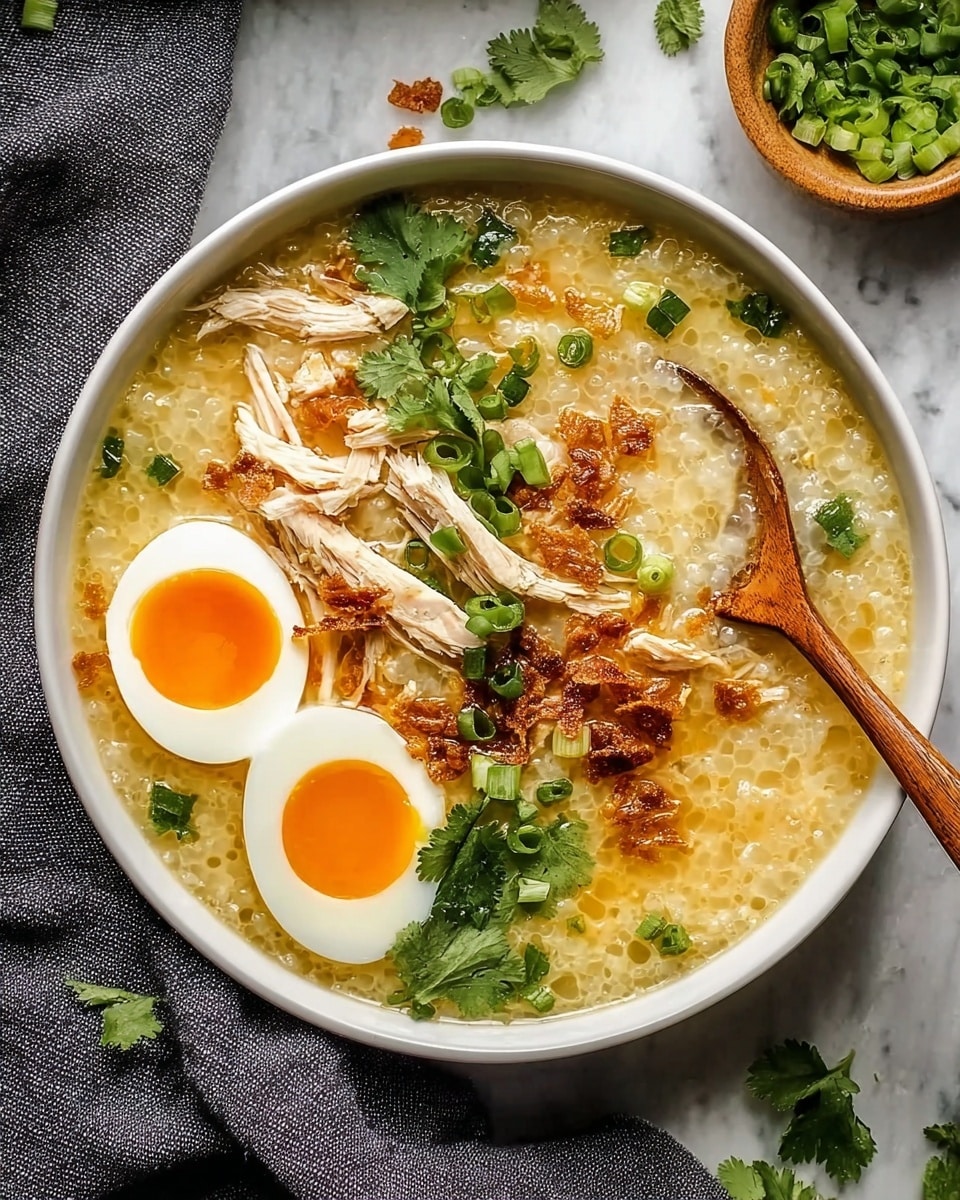
Nourishing Chicken Congee is a comforting and silky rice porridge perfect for any time you need a warm, satisfying meal. This recipe combines tender chicken, aromatic ginger, and flavorful toppings to create a bowl that soothes both body and soul.
Ingredients
- 4 bone-in, skin-on chicken thighs (essential for rich flavor; chicken breast can be used for a leaner dish)
- 1 tablespoon olive oil (used to render chicken skin; replace with sesame oil for a delightful twist)
- 2 inches fresh ginger (provides aromatic warmth)
- 6 scallions (use white parts for cooking and green parts for garnish)
- 3/4 cup sushi rice (key for the silky texture; jasmine rice can be substituted)
- 8 cups chicken stock (homemade or low-sodium store-bought for best flavor)
- 1 tablespoon toasted sesame oil (adds a nutty flavor; omit if allergic to sesame)
- Kosher salt (to taste)
- Ground white pepper (to taste)
- Cilantro (for garnish, adds a burst of freshness)
- Soft boiled eggs (rich and creamy, optional)
- Fried shallots (for crunch and savory depth)
- Chili crisp (optional, for a spicy kick)
- Soy sauce or ponzu (for an umami punch)
- Fresh ginger (optional finishing touch for added zest)
Instructions
- Step 1: Pat the chicken thighs dry and season them generously with kosher salt. Refrigerate uncovered for about 2 hours to enhance flavor and texture.
- Step 2: Slice the scallions, separating the white parts (thinly sliced for cooking) from the green parts (reserved for garnish). Julienne the ginger into matchsticks.
- Step 3: Rinse the sushi rice under cold water until the water runs clear, then drain and set aside.
- Step 4: Heat olive oil in a Dutch oven over medium-high heat. Cook the chicken thighs skin-side down for 5-6 minutes until golden and crispy. Remove and set aside.
- Step 5: In the same pot, sauté the ginger and white parts of the scallions for 2 minutes. Add the drained rice and stir for another minute.
- Step 6: Pour in the chicken stock and toasted sesame oil. Return the chicken thighs to the pot. Bring to a gentle boil, then reduce heat, cover, and simmer for 1 hour, stirring occasionally.
- Step 7: Preheat your oven to 350°F. Bake the reserved chicken skin on a baking sheet for about 20 minutes until crispy.
- Step 8: After simmering, remove the chicken thighs from the pot. Continue cooking the rice congee uncovered for an additional 30 minutes until desired thickness is reached.
- Step 9: Shred the cooked chicken meat and return it to the pot. Season the congee with kosher salt and ground white pepper to taste.
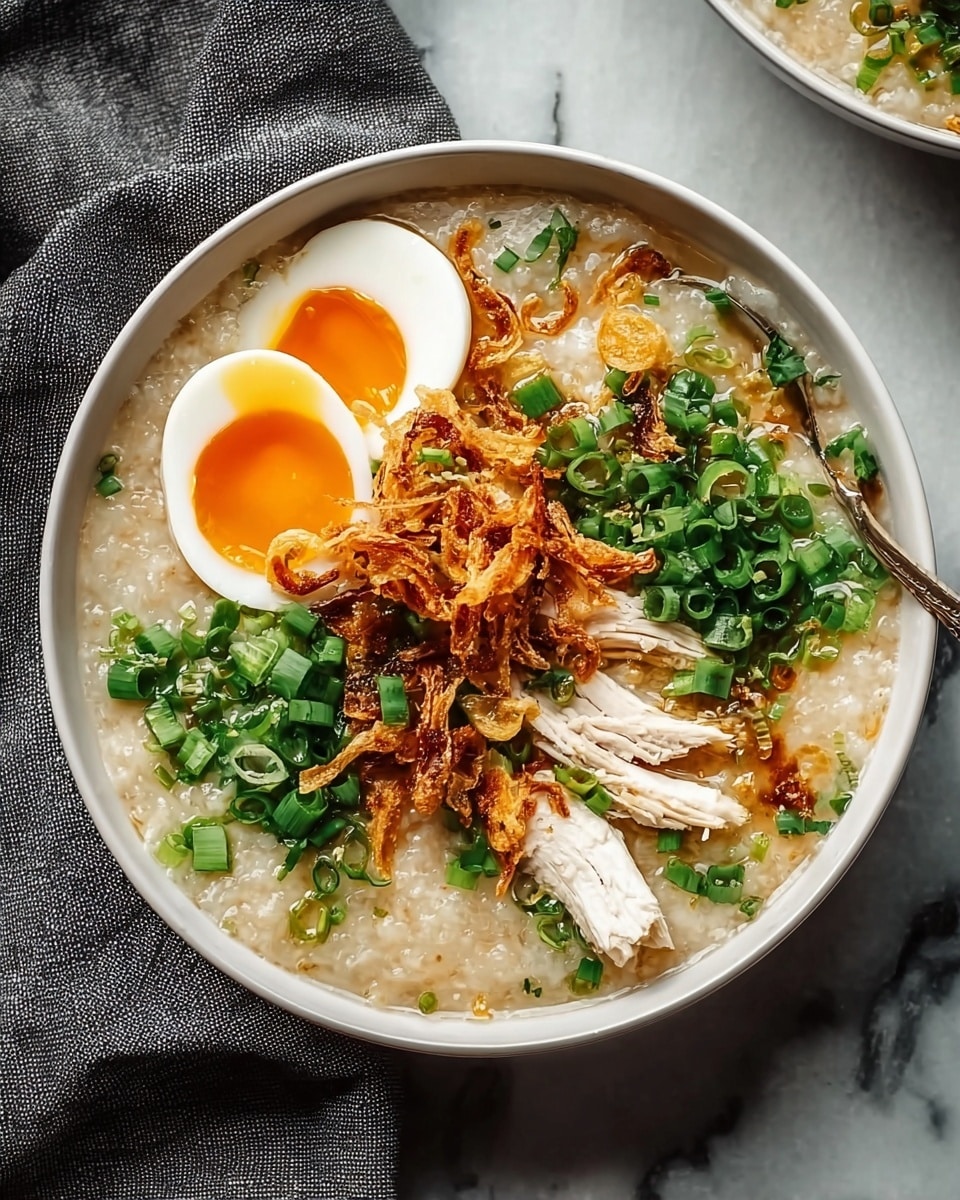
- Step 10: Ladle the congee into bowls. Top with crispy chicken skin, sliced green scallions, cilantro, soft boiled eggs, fried shallots, chili crisp, soy sauce or ponzu, and fresh ginger as desired.
Tips & Variations
- Use jasmine rice instead of sushi rice if you don’t have it on hand; the texture will be slightly different but still delicious.
- For a nut-free version, omit the toasted sesame oil and replace olive oil with a neutral oil.
- Soft boiled eggs add richness, but you can also serve with a poached egg for a different texture.
- Add sliced mushrooms or bok choy during simmering for extra vegetables.
- If you prefer a leaner dish, substitute chicken breast and reduce cooking time accordingly.
Storage
Store leftover congee in an airtight container in the refrigerator for up to 3 days. Reheat gently on the stovetop or in the microwave, adding a splash of water or broth to loosen the texture if needed. Crispy chicken skin is best served fresh but can be stored separately and reheated briefly in a hot oven to regain some crispness.
How to Serve
Serve this delicious recipe with your favorite sides.
FAQs
Can I use chicken breast instead of thighs?
Yes, you can use chicken breast for a leaner option. However, thighs provide more flavor and tenderness especially suited for this slow-cooked congee.
Is it necessary to bake the chicken skin separately?
Baking the chicken skin separately helps it become crispy, providing a delightful contrast in texture. You can skip this step if you prefer soft skin, but crispy skin adds extra flavor and crunch.
PrintNourishing Chicken Congee Recipe

This Nourishing Chicken Congee is a comforting and flavorful rice porridge featuring tender chicken thighs simmered to perfection with ginger, scallions, and a rich chicken broth. The recipe highlights a crispy baked chicken skin topping for added texture, complemented by fresh garnishes like cilantro, soft-boiled eggs, and chili crisp for a customizable and warming meal.
- Prep Time: 2 hours 15 minutes
- Cook Time: 1 hour 50 minutes
- Total Time: 4 hours 5 minutes
- Yield: 4 servings 1x
- Category: Breakfast, Main Dish
- Method: Stovetop
- Cuisine: Asian, Chinese
Ingredients
Main Ingredients
- 4 Bone-In Skin-On Chicken Thighs
- 3/4 cup Sushi Rice
- 8 cups Chicken Stock
- 1 tablespoon Olive Oil
- 1 tablespoon Toasted Sesame Oil
- 2 inches Ginger (sliced into matchsticks)
- 6 Scallions (white parts thinly sliced, green parts reserved for garnish)
- Kosher Salt, to taste
- Ground White Pepper, to taste
Optional Toppings and Garnishes
- Cilantro (fresh leaves)
- Soft Boiled Eggs
- Fried Shallots
- Chili Crisp
- Soy Sauce or Ponzu Sauce
- Fresh Ginger (for finishing touch)
Instructions
- Prepare the Chicken: Pat the chicken thighs dry with paper towels and season them generously with kosher salt. Place the thighs uncovered in the refrigerator for about 2 hours to enhance flavor and dry out the skin for crisping.
- Prep Scallions and Ginger: While the chicken is resting, slice the scallions separating the white parts (thin slices for cooking) and green parts (reserved for garnish). Julienne the ginger into matchsticks for sautéing and garnish.
- Rinse the Rice: Rinse the sushi rice under cold running water until the water runs clear to remove excess starch, then drain well and set aside.
- Sear the Chicken: Heat olive oil in a Dutch oven over medium-high heat. Add the seasoned chicken thighs skin-side down and cook for 5-6 minutes until the skin is golden brown and rendered. Remove chicken from the pot and set aside.
- Sauté Aromatics and Rice: In the same pot, sauté the ginger matchsticks and white parts of scallions for 2 minutes until fragrant. Add the drained rice and stir for an additional minute to coat the rice in oil and aromatics.
- Add Liquids and Simmer: Pour in the chicken stock and toasted sesame oil. Return the seared chicken thighs to the pot. Bring the mixture to a gentle boil, then reduce the heat to low, cover, and let it simmer for about 1 hour, stirring occasionally to prevent sticking.
- Bake the Chicken Skin: Preheat the oven to 350°F (175°C). Remove the chicken skin from the thighs and bake it on a lined baking sheet for about 20 minutes or until crispy and golden. Set aside.
- Finish Cooking the Congee: After the initial simmer, remove the chicken thighs from the pot. Continue cooking the rice mixture uncovered for an additional 30 minutes to thicken the congee, stirring occasionally.
- Shred Chicken and Season: Shred the cooled chicken meat from the thighs and return it to the pot. Taste and adjust seasoning with kosher salt and ground white pepper to your preference.
- Serve and Garnish: Ladle the congee into bowls. Top with crispy baked chicken skin, sliced green parts of scallions, optional cilantro, soft boiled eggs, fried shallots, chili crisp, soy or ponzu sauce, and a sprinkle of fresh ginger if desired for extra brightness.
Notes
- For a leaner congee, substitute chicken breast instead of thighs, but note the flavor will be lighter.
- If you have sesame allergies, omit the toasted sesame oil without greatly affecting the overall flavor.
- Using sushi rice is ideal for achieving the silky and creamy texture. Jasmine rice can be used as an alternative but may result in a slightly different consistency.
- Refrigerating the chicken uncovered helps dry out the skin for a crispier finish.
- Stir the congee occasionally during simmering to prevent sticking and encourage creaminess.
- Soft boiled eggs add a rich and creamy component to balance the savory porridge.
- Adjust the amount of chili crisp according to your preferred spice level.
Keywords: Chicken Congee, Rice Porridge, Comfort Food, Asian Breakfast, Nourishing Soup, Slow Simmered Chicken


