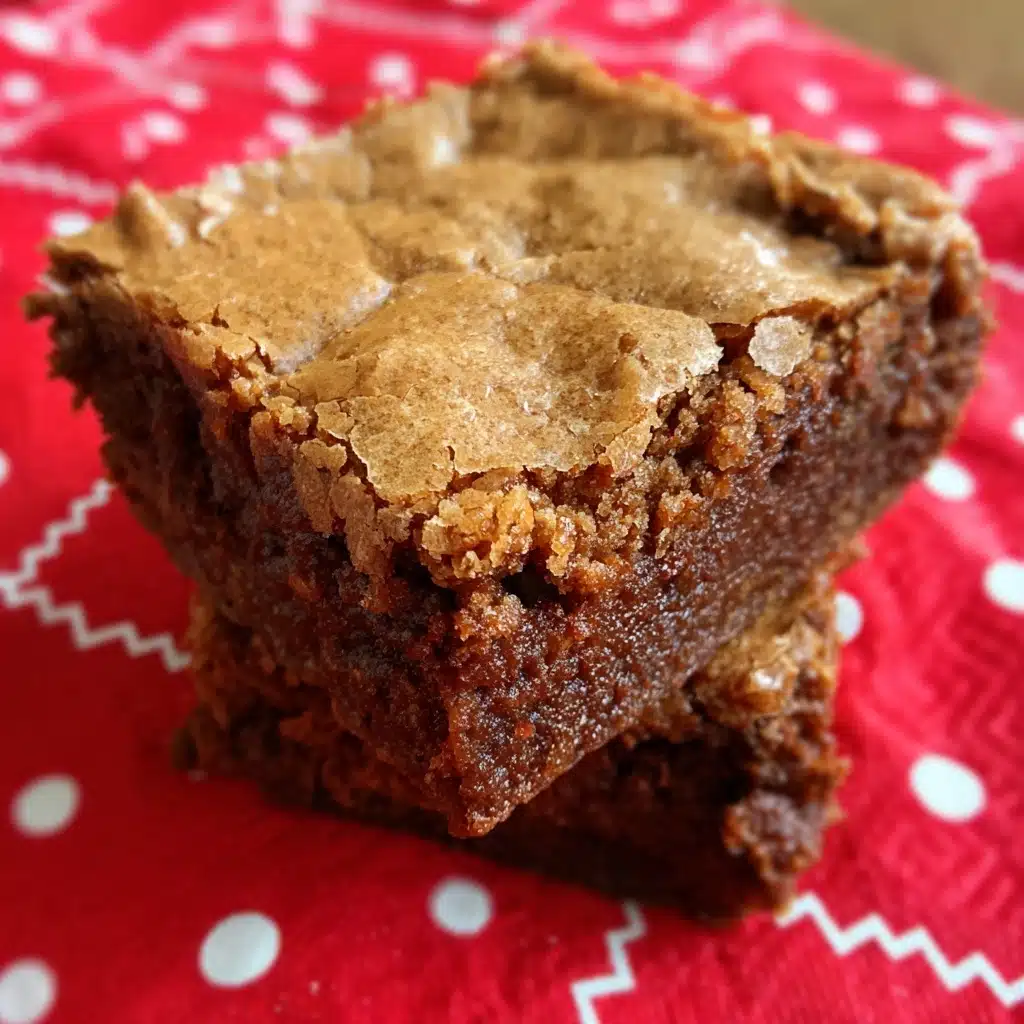
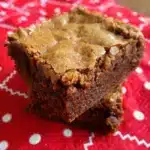
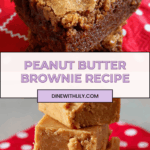
Peanut Butter Brownie Recipe
Get ready to meet your newest dessert obsession! This Peanut Butter Brownie Recipe is the stuff of sweet dreams: chewy, golden brownies swirled with creamy peanut butter and loaded with rich peanut butter chips and crunchy nuts. It’s a quick-bake miracle that comes together with just a handful of pantry staples, but tastes like you spent all afternoon in the kitchen. If you’re a fan of easy recipes that deliver big on both texture and flavor, this peanut butter-packed treat is about to become your go-to.
Ingredients You’ll Need
The beauty of this Peanut Butter Brownie Recipe is how effortlessly these classic kitchen ingredients work together. Each one adds something special, building a brownie that’s irresistibly rich and full of crave-worthy texture.
- Yellow cake mix: The ultimate shortcut for soft, moist brownies with perfect crumb and buttery flavor every single time.
- Eggs: These bind everything together, giving the brownies their signature chewy and dense bite.
- Vegetable oil: Adds extra moisture, ensuring your brownies stay tender instead of dry.
- Peanut butter (smooth or chunky): Layer in bold peanut flavor and choose chunky for pops of texture or smooth for silky richness.
- Peanut butter chips (or chocolate chips): These melt into gooey pools with each bite, making every square extra decadent.
- Peanuts or walnuts: Fold these in for a satisfying crunch and a hit of toasted, nutty goodness.
How to Make Peanut Butter Brownie Recipe
Step 1: Prep Your Oven and Pan
Start by preheating your oven to 350°F, giving it enough time to reach the perfect temperature. While it’s heating up, lightly grease a 9 x 9 inch pan (or a 9 x 13 if you prefer thinner bars). This ensures your brownies release beautifully and makes cleanup a breeze.
Step 2: Whip Up the Base
In a large mixing bowl, combine the yellow cake mix, eggs, and vegetable oil. Use a hand mixer or your stand mixer for a minute or two, mixing just until everything’s smooth and cohesive. The batter comes together quickly and will be thick, so don’t worry if it looks a little different from classic brownie batter!
Step 3: Add the Peanut Butter
Scoop in the peanut butter (go chunky if you want extra texture) and mix again until fully incorporated. This is the moment when the magic really starts—you’ll notice the batter becoming even more lush and creamy.
Step 4: Stir in the Mix-Ins
Gently fold in the peanut butter chips (or chocolate chips, if that’s your style) and chopped nuts. At this point, your batter will be quite thick—almost like cookie dough. That’s exactly what you want! The mix-ins will be distributed throughout every bite.
Step 5: Pat and Bake
Spread and gently pat the batter into your prepared pan, smoothing the top with a spatula or your hands. It won’t pour like traditional brownie batter, so just press it evenly to the edges. Slide it into the oven and bake for 14 to 17 minutes, until the top is golden brown and just set. Avoid overbaking if you like your brownies fudgy in the center.
Step 6: Cool and Slice
Take the pan out and let your brownies cool for at least 20 minutes. They’ll be soft and gooey at first, so patience pays off! Once set, slice into squares, serve, and enjoy the glorious moment of the first bite.
How to Serve Peanut Butter Brownie Recipe
Garnishes
Dress up your brownies with a simple dusting of powdered sugar, a drizzle of melted chocolate, or even extra peanut butter zigzags on top. A swirl of whipped cream and a sprinkle of chopped nuts can instantly turn each square into a show-stopper!
Side Dishes
For a dreamy dessert plate, pair your Peanut Butter Brownie Recipe with a scoop of vanilla or coffee ice cream. A handful of fresh strawberries or sliced bananas on the side cuts through the richness and adds a pop of color, making every bite feel balanced and fresh.
Creative Ways to Present
Stack brownies on a platter with parchment squares between layers for a rustic bakery vibe, or use a cookie cutter to make playful shapes for birthdays or gatherings. For individual servings, wrap them in waxed paper tied with twine for a sweet homemade gift.
Make Ahead and Storage
Storing Leftovers
Keep your leftover brownies moist and chewy by storing them in an airtight container at room temperature. They’ll stay fresh for about three days—if you can manage not to eat them all in one sitting!
Freezing
For longer storage, wrap cooled brownies tightly in plastic wrap and pop them in a freezer-safe bag or container. They’ll freeze beautifully for up to two months. When you’re ready to indulge, just thaw at room temperature for a soft, chewy texture.
Reheating
If you love a warm, gooey treat, zap a brownie square in the microwave for about 10-15 seconds. This brings back that just-baked softness and even melts the chips inside for an extra-indulgent bite.
FAQs
Can I use chocolate chips instead of peanut butter chips?
Absolutely! If you’re a chocolate lover, feel free to swap in chocolate chips for peanut butter chips. They’ll add a rich, melty swirl that pairs brilliantly with the peanut butter base of this Peanut Butter Brownie Recipe.
Should I use smooth or chunky peanut butter?
That depends on your preferred texture! Smooth peanut butter creates a more uniform, creamy bar, while chunky adds delightful pieces of peanut throughout. You really can’t go wrong either way.
Can I double the Peanut Butter Brownie Recipe?
Yes! Easily double all ingredients and use a larger baking pan, such as a 13 x 18 sheet pan or two 9 x 13 pans. Just monitor baking time and look for that gorgeous golden top.
How do I know when the brownies are done?
Watch for the edges to turn golden brown and the center to look set but still soft. Since these brownies are gooey, avoid overbaking—the middle should feel a little springy when gently pressed.
What’s the best way to cut gooey brownies cleanly?
Let them cool fully, then use a sharp knife dipped in hot water and dried between slices. This helps create neat, bakery-worthy squares without sticking or tearing.
Final Thoughts
If you’re craving an effortless, decadent dessert with irresistible layers of peanut butter and crunchy nuts, this Peanut Butter Brownie Recipe packs a ton of flavor and fun into every bite. I hope you give it a try—you might just find your new favorite treat!
PrintPeanut Butter Brownie Recipe
Indulge in the rich and decadent flavors of these Peanut Butter Brownies. With a base of yellow cake mix, these brownies are loaded with peanut butter, peanut butter chips, and crunchy nuts for the perfect balance of sweet and salty.
- Prep Time: 15 minutes
- Cook Time: 15 minutes
- Total Time: 30 minutes
- Yield: 16 brownies 1x
- Category: Dessert
- Method: Baking
- Cuisine: American
- Diet: Vegetarian
Ingredients
Cake Mix Base:
- 1 yellow cake mix
- 2 eggs
- 1/3 cup vegetable oil
Peanut Butter Mixture:
- 1/2 cup peanut butter (smooth or chunky)
- 1 cup peanut butter chips (or chocolate)
- 1/2 cup peanuts or walnuts
Instructions
- Prepare the Batter: Using a hand-held or Kitchen Aid Mixer, combine the cake mix, eggs, and vegetable oil. Add and mix in the peanut butter until well incorporated.
- Add Mix-Ins: Stir in the nuts and peanut butter chips until evenly distributed. The batter will be thick!
- Bake: Press the batter into a 9 x 9-inch pan (or a 9 x 13-inch pan for thinner brownies). Bake at 350°F for 14-17 minutes, or until golden brown.
- Cool and Serve: Allow the brownies to cool for at least 20 minutes before cutting into squares. Enjoy the soft and gooey goodness!
Nutrition
- Serving Size: 1 brownie
- Calories: 280
- Sugar: 18g
- Sodium: 320mg
- Fat: 18g
- Saturated Fat: 5g
- Unsaturated Fat: 12g
- Trans Fat: 0g
- Carbohydrates: 26g
- Fiber: 1g
- Protein: 5g
- Cholesterol: 20mg
Keywords: Peanut Butter Brownies, Peanut Butter Dessert, Cake Mix Brownies
