Rosette Chocolate Cake with Purple Buttercream Frosting Recipe
Introduction
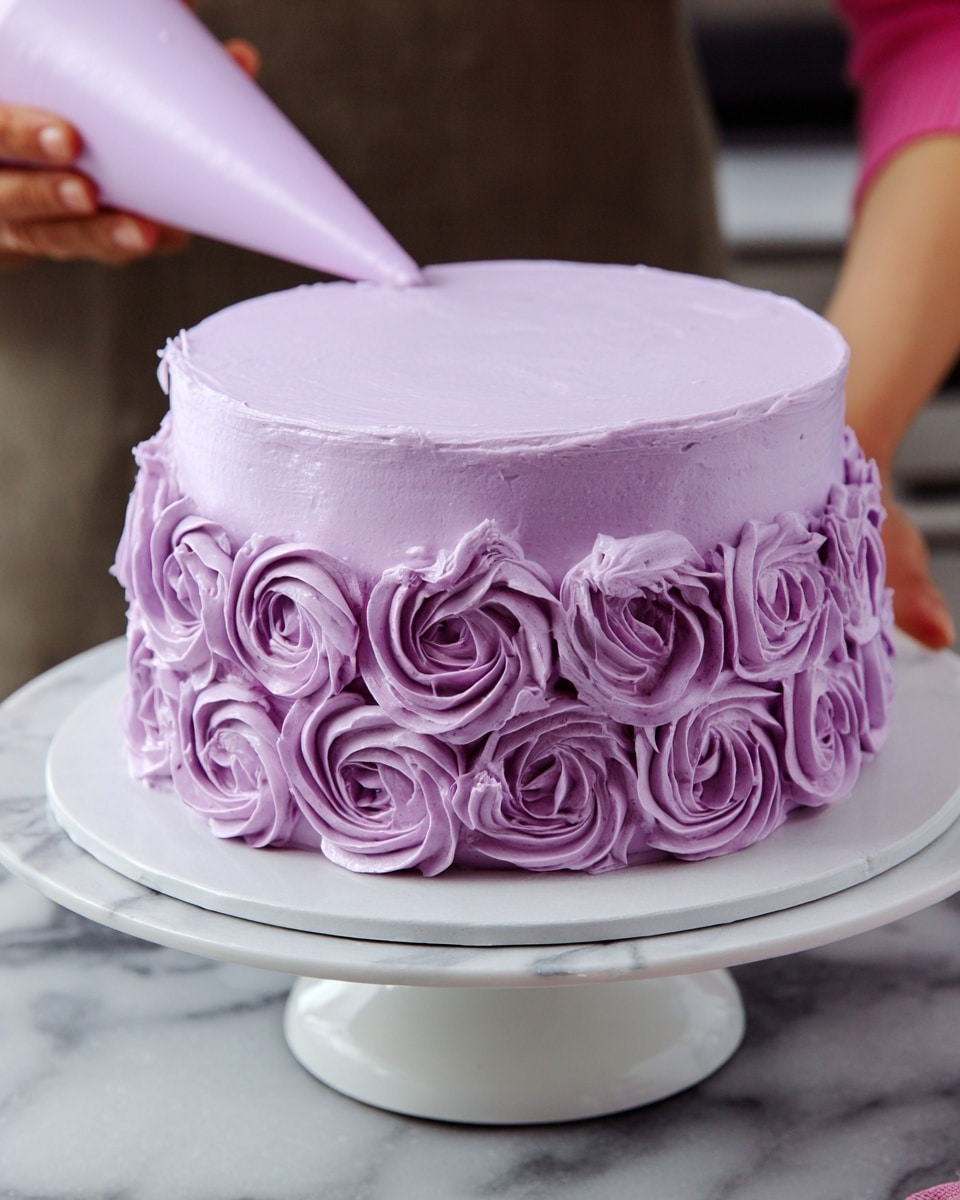
The Rosette Cake is a stunning dessert that combines moist chocolate layers with creamy purple buttercream decorated in beautiful rosettes. Perfect for special occasions, this cake is as delicious as it is impressive to look at.
Ingredients
- 2 cups all-purpose flour (260 grams)
- 2 cups granulated sugar (400 grams)
- 3/4 cup unsweetened cocoa powder, sifted (75 grams)
- 2 tsp baking powder (8 grams)
- 1 1/2 tsp baking soda (9 grams)
- 1 tsp fine salt (6 grams)
- 1 cup very hot water (237 grams)
- 2 tsp instant espresso or coffee (6 grams)
- 1 cup buttermilk, room temperature (240 grams)
- 1/2 cup vegetable or canola oil (120 grams)
- 2 tsp vanilla extract or vanilla bean paste (8 grams)
- 1 tsp vinegar (4 grams)
- 2 large eggs, room temperature (112 grams)
- 3 cups unsalted butter, room temperature (678 grams)
- 1 Tbsp vanilla extract or vanilla bean paste (12 grams)
- 1 tsp fine salt (6 grams)
- 10 cups powdered sugar (1250 grams)
- 1/3 cup heavy whipping cream, room temperature (75 grams)
- Purple food coloring
- Open star piping tip
- Large piping bag
Instructions
- Step 1: Preheat your oven to 350°F. Line three 8-inch or four 7-inch cake pans with parchment paper rounds and grease them with non-stick baking spray. If you don’t have enough pans, bake the layers in batches; the batter will hold for an hour or two at room temperature.
- Step 2: In a large bowl, whisk together the flour, sugar, cocoa powder, baking powder, baking soda, and salt until fully combined.
- Step 3: In a medium bowl, dissolve the instant espresso or coffee into the hot water. Then stir in buttermilk, oil, vanilla extract, and vinegar until just combined.
- Step 4: Pour the wet ingredients into the dry ingredients and mix by hand until fully incorporated.
- Step 5: Add the eggs one at a time, stirring well after each addition. The batter will be thin, which is expected.
- Step 6: Divide the batter evenly among the prepared pans and bake for 24 to 27 minutes, or until a toothpick inserted in the center comes out clean.
- Step 7: Let the cakes cool in the pans for 5 minutes, then run an offset spatula around the edges to loosen them. Transfer to the freezer for 30 minutes to speed up cooling. Once cool, remove from the pans and level the tops with a serrated knife.
- Step 8: To make the purple buttercream, beat the unsalted butter on medium speed until smooth, about 1-2 minutes. Add vanilla extract and salt, mixing on low.
- Step 9: Gradually add powdered sugar while mixing slowly. Halfway through, pour in the heavy cream to help achieve a smooth consistency. Continue mixing until the frosting is light and fluffy.
- Step 10: Add purple food coloring to your desired shade, scraping the bowl to ensure an even color throughout. Cover to prevent crusting and set aside.
- Step 11: Assemble the cake by stacking and frosting each layer on a greaseproof cake board or plate, using a small amount of frosting to secure the bottom layer.
- Step 12: Apply an even layer of purple buttercream between each cake layer, then spread a thin crumb coat around the entire cake. Smooth with a bench scraper and chill for 30 minutes in the fridge or 10 minutes in the freezer.
- Step 13: Fill a large piping bag fitted with an open star tip with the remaining frosting. Seal the top to avoid mess.
- Step 14: Create two evenly spaced horizontal guide lines around the cake using an offset spatula or butter knife. These will help you pipe three even rows of rosettes.
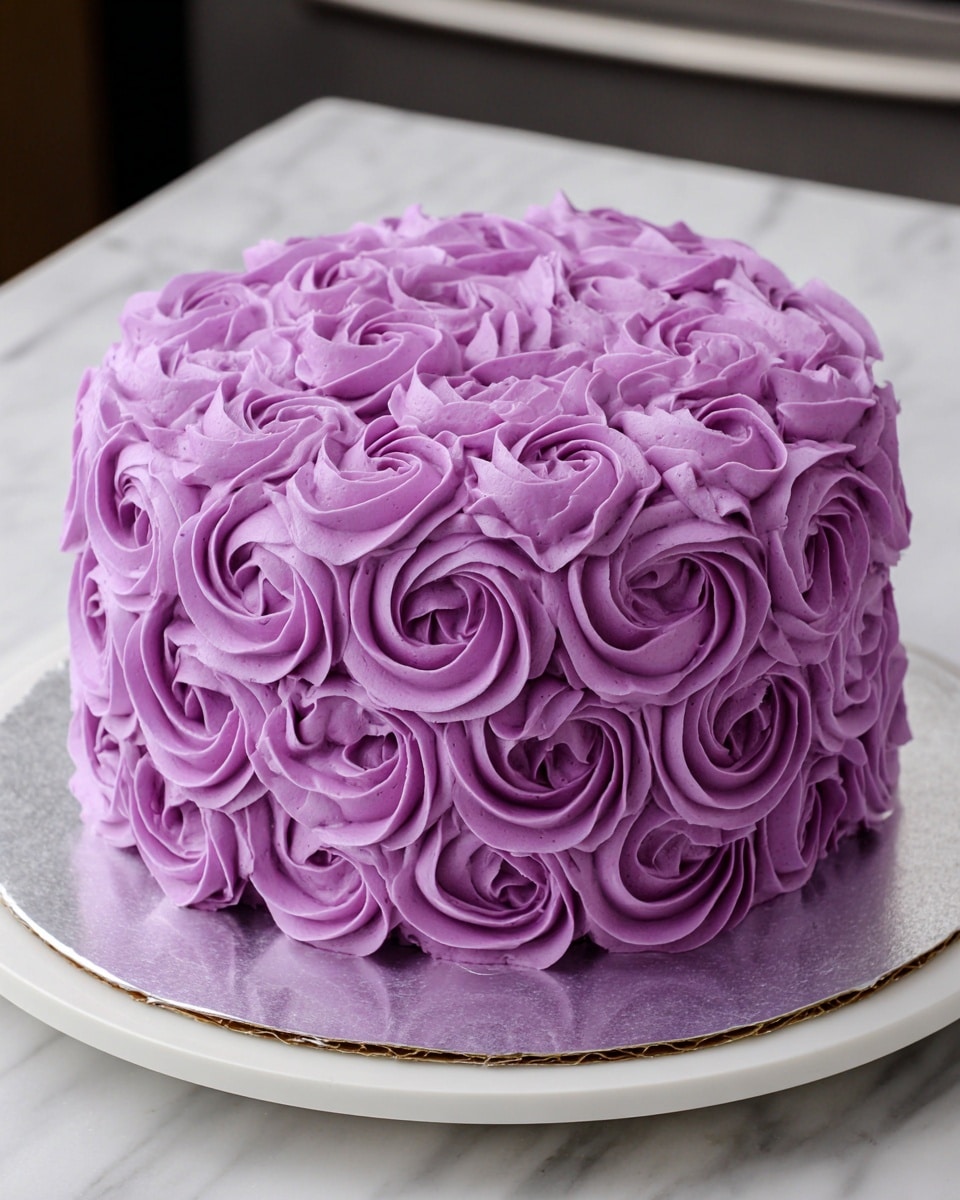
- Step 15: Pipe rosettes along the bottom guide, working in the same direction and taking breaks if needed. Repeat the process for the middle and top rows, then fill the top of the cake with rosettes, piping from the edge inward.
- Step 16: For a neat finish, end each rosette where the next one begins to hide the tail underneath the following rosette.
- Step 17: Chill the decorated cake in the fridge for at least 30 minutes to allow the rosettes to set before serving.
Tips & Variations
- If you don’t have instant espresso, strong brewed coffee works well as a substitute to enhance the chocolate flavor.
- Use gel or paste food coloring for a more vibrant purple without thinning the buttercream.
- If the frosting feels too thick, add a bit more heavy cream, a teaspoon at a time, until you reach the desired consistency.
- For faster cooling, place the cake layers in the freezer but wrap them tightly if freezing for longer storage.
- Try adding a layer of raspberry jam between cake layers for a fruity twist.
Storage
Store the cake covered in the refrigerator for up to 4 days. Let it sit at room temperature for 20-30 minutes before serving for the best texture. You can freeze the unfrosted cake layers wrapped tightly in plastic wrap for up to 3 months; thaw in the refrigerator before frosting and assembling.
How to Serve
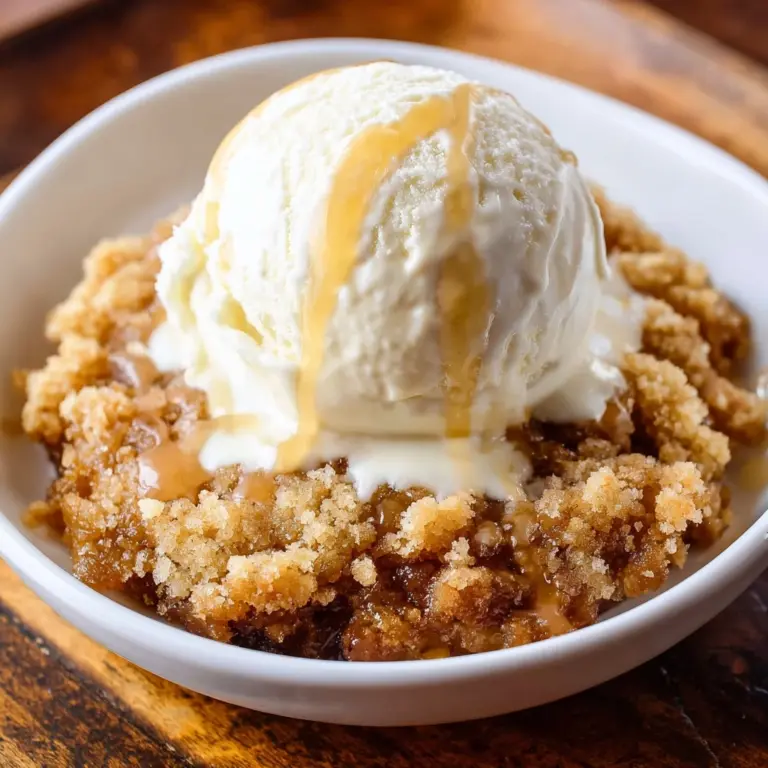
Serve this delicious recipe with your favorite sides.
FAQs
Can I use regular milk instead of buttermilk?
Yes, you can substitute regular milk mixed with 1 tablespoon of vinegar or lemon juice per cup to mimic buttermilk’s acidity needed for the cake to rise properly.
How do I prevent the rosettes from melting?
Keep the cake chilled during decorating and after assembly. Avoid working in a warm environment and use cold butter for the frosting to help maintain the shape of the rosettes.
PrintRosette Chocolate Cake with Purple Buttercream Frosting Recipe
This Rosette Cake recipe features moist, rich chocolate cake layers infused with espresso and buttermilk, complemented by a luscious purple buttercream frosting piped into elegant rosettes. Perfect for special occasions, this visually stunning cake combines classic chocolate flavor with beautiful decorative detail made simple through easy-to-follow steps.
- Prep Time: 30 minutes
- Cook Time: 27 minutes
- Total Time: 1 hour 30 minutes
- Yield: 12 servings 1x
- Category: Dessert
- Method: Baking
- Cuisine: American
Ingredients
Chocolate Cake Layers
- 2 cups all-purpose flour (260 grams)
- 2 cups granulated sugar (400 grams)
- 3/4 cup unsweetened cocoa powder, sifted (75 grams)
- 2 tsp baking powder (8 grams)
- 1 1/2 tsp baking soda (9 grams)
- 1 tsp fine salt (6 grams)
- 1 cup very hot water (237 grams)
- 2 tsp instant espresso or coffee (6 grams)
- 1 cup buttermilk, room temperature (240 grams)
- 1/2 cup vegetable or canola oil (120 grams)
- 2 tsp vanilla extract or vanilla bean paste (8 grams)
- 1 tsp vinegar (4 grams)
- 2 large eggs, room temperature (112 grams)
Purple Buttercream Frosting
- 3 cups unsalted butter, room temperature (678 grams)
- 1 Tbsp vanilla extract or vanilla bean paste (12 grams)
- 1 tsp fine salt (6 grams)
- 10 cups powdered sugar (1250 grams)
- 1/3 cup heavy whipping cream, room temperature (75 grams)
- Purple food coloring, to desired intensity
Additional Tools
- Open star piping tip
- Large piping bag
- Offset spatula
- Greaseproof cake board or plate
Instructions
- Preheat and Prepare Pans: Preheat your oven to 350°F (175°C). Line three 8-inch or four 7-inch cake pans with parchment paper rounds and lightly grease them with non-stick baking spray. If you don’t have enough pans, you can bake the layers in batches; the batter will hold well at room temperature for up to two hours.
- Mix Dry Ingredients: In a large bowl, whisk together the all-purpose flour, granulated sugar, sifted unsweetened cocoa powder, baking powder, baking soda, and salt until thoroughly combined.
- Dissolve Espresso in Hot Water: In a separate medium bowl, stir the instant espresso or coffee into the very hot water until fully dissolved.
- Combine Wet Ingredients: To the espresso mixture, add the buttermilk, vegetable or canola oil, vanilla extract, and vinegar. Stir briefly to combine all wet ingredients evenly.
- Incorporate Wet and Dry Mixtures: Pour the wet mixture into the bowl with the dry ingredients. Mix gently by hand until just combined without overmixing.
- Add Eggs: Beat in the eggs one at a time, thoroughly incorporating each before adding the next. The batter will be thin—that’s the right consistency to ensure a moist cake.
- Divide Batter and Bake: Evenly distribute the batter between the prepared pans. Bake for 24 to 27 minutes, or until a toothpick inserted in the center comes out clean.
- Cool the Cake Layers: Remove pans from the oven and let them rest for about 5 minutes. Run an offset spatula around the edges to loosen, then transfer to the freezer for 30 minutes to speed cooling. Once cooled, remove the cake layers carefully and use a serrated knife to level their tops.
- Make Purple Buttercream Frosting: Using a stand mixer with paddle attachment or a hand mixer, beat softened unsalted butter on medium speed for 1-2 minutes until smooth. Mix in vanilla extract and salt on low speed. Gradually add powdered sugar, and halfway through, add the heavy cream to ease mixing. Continue blending on low until the frosting is creamy and spreadable. Add purple food coloring a few squirts at a time, mixing well and scraping the bowl to ensure a uniform color. Cover frosting with plastic wrap to prevent drying.
- Assemble the Cake: Place a cake board or plate under the first cake layer, securing it with a small dab of frosting. Spread an even layer of purple buttercream on top. Repeat stacking and frosting with remaining cake layers.
- Crumb Coat and Chill: Apply a thin, smooth layer of frosting over the entire cake to seal in crumbs. Use a bench scraper to smooth the sides and top. Chill the cake in the refrigerator for 30 minutes, or in the freezer for 10 minutes, until the frosting firms.
- Pipe Rosettes: Fill a large piping bag fitted with an open star tip with the remaining frosting. Seal the top of the bag with a rubber band. Using an offset spatula, create two evenly spaced horizontal guide lines circling the cake’s sides. These lines help pipe three rows of evenly sized and spaced rosettes.
- Decorate with Rosettes: Pipe rosettes starting from the bottom edge, following the guide line and moving in the same direction for consistency. Repeat for the next two rows, then pipe rosettes on top, working from the edges inward. For a seamless look, end each rosette at the point where the next will begin, hiding any frosting tail.
- Final Chill: Refrigerate the fully decorated cake for at least 30 minutes to set the rosettes firmly before slicing and serving.
Notes
- If you don’t have instant espresso powder, substitute with instant coffee granules but be mindful of the flavor intensity.
- Allow the butter and eggs to come to room temperature for better mixing and texture.
- The thin batter consistency is key to achieving a moist chocolate cake, so do not add extra flour.
- Chilling the cake layers after baking helps with cleaner slicing and easier assembly.
- Use gel-based food coloring for vibrant colors without altering frosting consistency.
- A serrated knife is best for leveling and cutting cake layers without tearing.
- This cake can be made a day ahead; store wrapped tightly in the refrigerator.
Keywords: Rosette Cake, Chocolate Cake, Buttercream Frosting, Cake Decorating, Elegant Cake, Chocolate Layer Cake, Espresso Cake
