Snow Skin Mooncakes Recipe
Introduction
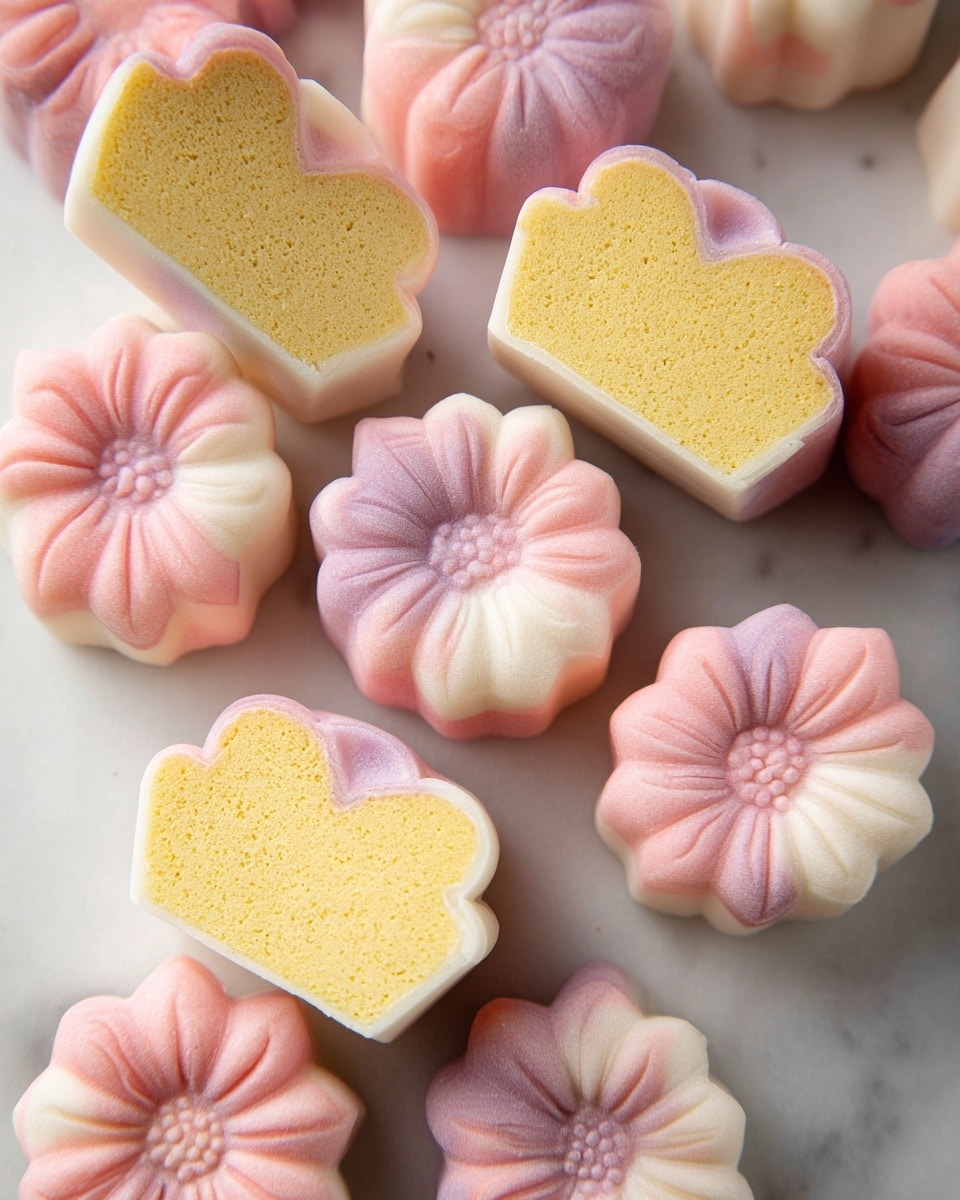
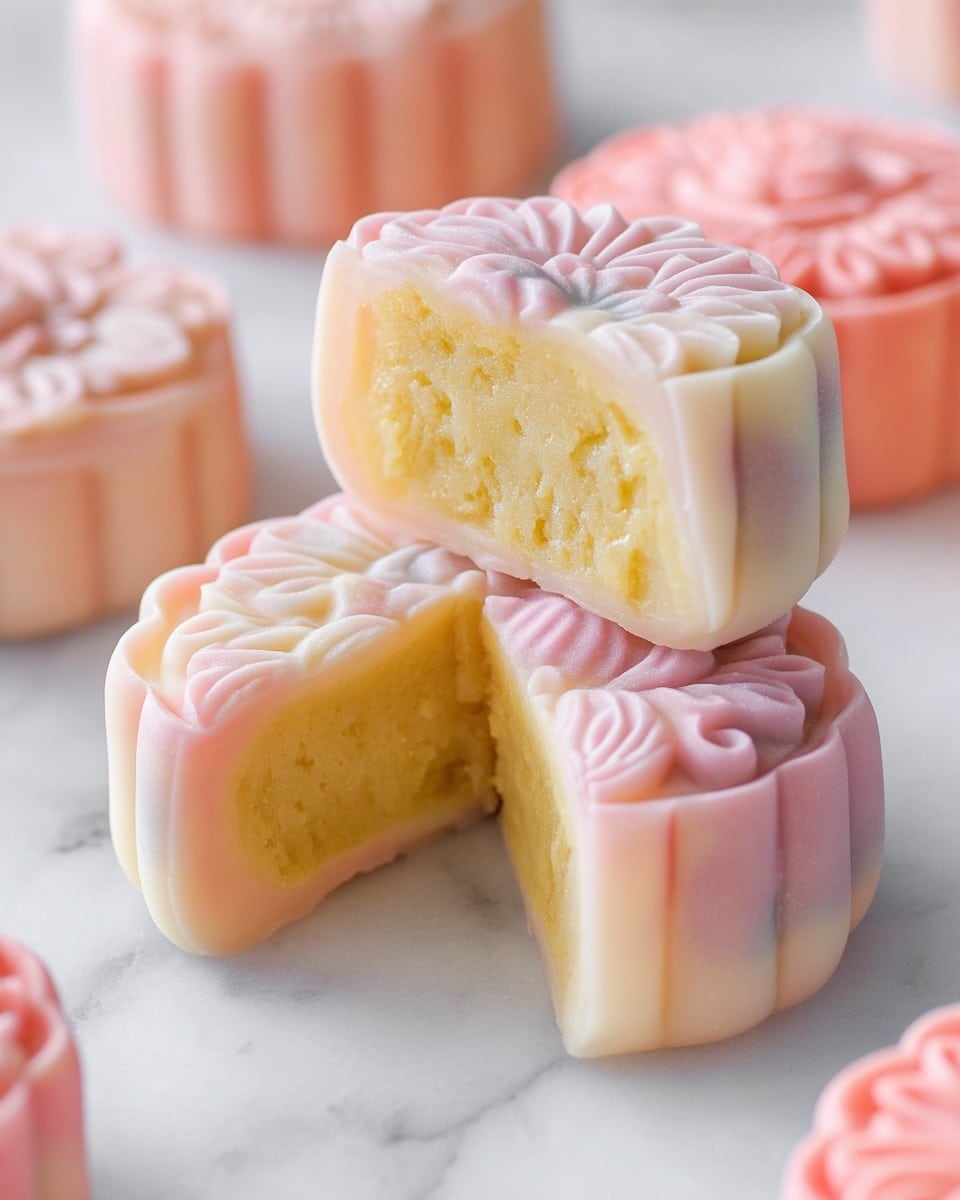
Snow Skin Mooncakes offer a delightfully soft and chewy texture, filled with rich custard. This no-bake treat is perfect for those who want a refreshing alternative to traditional baked mooncakes, especially during festive seasons.
Ingredients
- 2/3 cup (90g) milk powder
- 1/3 cup (45g) cornstarch
- 1/2 cup (50g) powdered sugar
- 1/4 teaspoon salt
- 3/4 cup (200g) milk
- 5 large egg yolks
- 2 tablespoon (40g) condensed milk
- 3 tablespoon (40g) unsalted butter
- 1/2 teaspoon vanilla extract
- 1 cup (120g) rice flour
- 1 cup (120g) glutinous rice flour
- 1/2 cup (60g) wheat starch
- 1 cup (100g) powdered sugar
- 1 1/2 cup (350g) whole milk
- 1/4 cup (55g) vegetable oil
- 1/2 teaspoon vanilla extract
- Cornstarch (for dusting)
- Food coloring or flavoring of your choice
Instructions
- Step 1: Prepare the custard filling by whisking together the milk powder, cornstarch, powdered sugar, and salt in a medium bowl.
- Step 2: In a separate bowl, combine the milk, egg yolks, and condensed milk until fully mixed.
- Step 3: Pour the wet mixture into the dry ingredients and mix until smooth.
- Step 4: Transfer the mixture to a saucepan and cook over medium heat, stirring constantly for about 5 minutes until thickened.
- Step 5: Remove from heat, then stir in butter and vanilla extract until the mixture forms a solid paste. Let it cool slightly.
- Step 6: Cover the custard with plastic wrap pressed directly on the surface and chill in the refrigerator for 1 hour or freezer for 20 minutes.
- Step 7: Divide the cooled custard into 25g, 37g, or 50g balls depending on your mooncake mold size. Keep refrigerated until assembly.
- Step 8: For the snow skin, sift rice flour, glutinous rice flour, wheat starch, and powdered sugar together in a large bowl.
- Step 9: Mix milk, vegetable oil, and vanilla extract in a separate bowl until combined.
- Step 10: Gradually add the wet ingredients to the dry mixture in small amounts, stirring continuously until fully incorporated and smooth.
- Step 11: Strain the batter through a fine mesh sieve to remove lumps into a heatproof bowl suitable for steaming.
- Step 12: Steam the batter over boiling water for 18-20 minutes on medium-high heat until the dough is cooked and firm.
- Step 13: Allow the steamed dough to cool for 5 minutes before kneading on a clean surface with food-safe gloves until smooth, about 5 minutes.
- Step 14: Wrap the dough in plastic and chill in the refrigerator for at least 30 minutes before shaping.
- Step 15: Divide and knead in your chosen food coloring or flavoring as desired, then combine colored dough pieces into one ball.
- Step 16: Portion the dough and custard filling evenly based on your mold size, aiming for a 1:1 ratio for dough to filling.
- Step 17: Roll dough into a thin disc about 4 inches across, place a custard ball in the center, and wrap the dough around it, pinching the edges to seal.
- Step 18: Lightly dust the surface of each ball with cornstarch to prevent sticking.
- Step 19: Dust the inside of the mooncake mold with cornstarch, place the ball inside, press firmly for 10-15 seconds, then unmold the mooncake.
- Step 20: Repeat the molding process with remaining dough and filling, then serve immediately or chill before serving.
Tips & Variations
- Use food-safe gloves while kneading and shaping to prevent the dough from sticking to your hands.
- Experiment with different food colorings or natural flavorings like matcha or pandan to customize your mooncake skins.
- Adjust the dough-to-filling ratio slightly to suit your preferred balance of skin and custard.
- Ensure the custard filling is completely chilled before wrapping to make shaping easier.
Storage
Store snow skin mooncakes in an airtight container in the refrigerator for up to 3 days. To serve, allow them to come to room temperature or chill further if you prefer them cool. Avoid freezing as it can alter the mooncake’s delicate texture.
How to Serve
Serve this delicious recipe with your favorite sides.
FAQs
Can I make the custard filling ahead of time?
Yes, the custard can be prepared and refrigerated in advance for up to 2 days. Just ensure it is well covered to prevent drying out.
What can I use if I don’t have wheat starch?
Wheat starch is important for the chewy texture, but as a substitute, you can try tapioca starch or cornstarch, though the texture may be slightly different.
PrintSnow Skin Mooncakes Recipe

Snow Skin Mooncakes are a delightful non-baked treat featuring a tender, chewy snow skin wrapped around a creamy custard filling. This recipe combines steamed glutinous rice flour dough with a rich, melt-in-your-mouth egg custard, then molds the mooncakes into beautiful shapes perfect for festive celebrations or elegant desserts.
- Prep Time: 40 minutes
- Cook Time: 25 minutes
- Total Time: 1 hour 5 minutes
- Yield: Approximately 12 mooncakes (depending on mold size) 1x
- Category: Dessert
- Method: Steaming
- Cuisine: Chinese
Ingredients
Custard Filling
- 2/3 cup (90g) milk powder
- 1/3 cup (45g) cornstarch
- 1/2 cup (50g) powdered sugar
- 1/4 teaspoon salt
- 3/4 cup (200g) milk
- 5 large egg yolks
- 2 tablespoon (40g) condensed milk
- 3 tablespoon (40g) unsalted butter
- 1/2 teaspoon vanilla extract
Snow Skin
- 1 cup (120g) rice flour
- 1 cup (120g) glutinous rice flour
- 1/2 cup (60g) wheat starch
- 1 cup (100g) powdered sugar
- 1 1/2 cup (350g) whole milk
- 1/4 cup (55g) vegetable oil
- 1/2 teaspoon vanilla extract
- Cornstarch (for dusting)
- Food coloring or flavoring of your choice
Instructions
- Mix Custard Dry Ingredients: In a medium mixing bowl, whisk together the milk powder, cornstarch, powdered sugar, and salt until evenly combined.
- Mix Custard Wet Ingredients: In a separate bowl, mix the milk, egg yolks, and condensed milk thoroughly until smooth and combined.
- Combine Custard Mixtures: Gradually add the wet ingredients into the dry ingredients, mixing thoroughly until a uniform custard batter forms.
- Cook the Custard: Pour the custard batter into a small saucepan over medium heat. Stir constantly for about 5 minutes until the mixture thickens noticeably.
- Add Butter and Vanilla: Once thickened, stir in the unsalted butter and vanilla extract with a rubber spatula. Continue mixing and folding until the custard forms a solid paste that holds its shape and is smooth but not clumpy. Remove from heat.
- Chill Custard: Transfer custard to a shallow bowl and press plastic wrap directly on its surface to prevent skin formation. Refrigerate for about 1 hour or freeze for 20 minutes until firm.
- Portion Custard: Divide the chilled custard into balls according to mold size—25g balls for 50g molds, 37g for 75g molds, or 50g for 100g molds. Keep covered in the refrigerator until assembly.
- Sift Snow Skin Dry Ingredients: In a large bowl, sift together the rice flour, glutinous rice flour, wheat starch, and powdered sugar. Whisk to combine well.
- Mix Snow Skin Wet Ingredients: In another bowl, combine whole milk, vegetable oil, and vanilla extract until fully blended.
- Combine Snow Skin Mixtures: Make a well in the dry ingredients and gradually add 2-3 tablespoons of the wet mix at a time, stirring until fully incorporated before adding more. Continue until all milk mixture is combined into a thin, runny batter.
- Strain Batter: Pass the batter through a fine mesh sieve into a heatproof bowl suitable for steaming to remove any lumps and achieve a smooth consistency.
- Steam Snow Skin Batter: Set up a steamer with boiling water and steam the batter on medium-high heat for 18-20 minutes. It is done when a spoon inserted comes out clean and the dough feels firm. Remove and let cool for 5 minutes.
- Knead Snow Skin Dough: Wearing food-safe gloves, knead the warm dough on a clean surface for about 5 minutes until smooth and elastic.
- Chill Dough: Shape the dough into a ball, wrap tightly with plastic wrap, and refrigerate for at least 30 minutes. Dough can be kept chilled for up to 2 hours.
- Color Dough: Divide the dough into portions and knead in your chosen food coloring or flavorings. Combine colored dough pieces into one large ball if desired.
- Prepare for Assembly: Roll the dough into thin discs roughly 4 inches in diameter. Match dough weight to custard filling weight for a balanced mooncake (i.e., a 50g mold uses 25g dough and 25g filling).
- Fill and Shape Mooncakes: Place a custard ball in the center of each dough disc. Wrap skin around custard fully and pinch to seal. Lightly dust the surface with cornstarch to avoid sticking.
- Mold Mooncakes: Dust the inside of the mooncake mold with cornstarch. Place the filled dough ball inside, press firmly and hold for 10-15 seconds, then release the patterned mooncake. Repeat for remaining pieces.
- Serve or Chill: Serve the mooncakes immediately or place them in an airtight container and chill in the refrigerator for at least one hour to allow the skin to set for best texture.
Notes
- Use food-safe gloves when kneading sticky dough to prevent sticking and ensure hygiene.
- Press plastic wrap directly on custard surface to avoid forming a skin while chilling.
- Maintain a 1:1 ratio of dough to filling weight to achieve a perfectly balanced mooncake.
- Steaming times can slightly vary depending on your steamer; ensure the batter is fully cooked by checking with a clean spoon.
- Snow skin dough can be tinted with natural or artificial food coloring for decorative effects.
- Store finished mooncakes in an airtight container and consume within 2 days for best freshness.
Keywords: Snow Skin Mooncakes, Chinese Mooncakes, No Bake Mooncakes, Custard Mooncakes, Glutinous Rice Flour Dessert, Festive Asian Desserts
